mirror of
https://github.com/AstrBotDevs/AstrBot
synced 2026-07-16 01:40:15 +08:00
 e218620a37
* feat: add one-line deploy script (deploy-cli.sh) and update cli.md

- Add docs/scripts/deploy-cli.sh for one-command deployment (Linux/macOS/WSL)
- Update docs/zh/deploy/astrbot/cli.md to reference local script
- Replace non-existent https://astrbot.app/deploy.sh with raw.githubusercontent.com URL
- Add local run tip and WSL-based Windows support

* fix: address PR review feedback for deploy-cli.sh

- Replace sort -V with Python-native version check (macOS BSD compat)
- Bump Python requirement from >=3.10 to >=3.12 (match pyproject.toml)
- Detect current directory as project root (avoid nested clone)
- Handle existing non-git directory explicitly
- Add curl dependency check
- Support ASTRBOT_REPO and ASTRBOT_DIR env vars for forks/mirrors
- Update cli.md version description to match

* feat: add Windows PowerShell deploy script and update docs

- Add deploy-cli.ps1 for Windows native environment (PowerShell 7+)
- Update cli.md to document Windows one-liner deployment
- Add local script execution instructions for both bash and ps1

* refactor: standardize log messages and improve clarity in various modules

Co-authored-by: Copilot <copilot@github.com>

* docs: 移除一行命令快速部署部分,简化安装说明

* feat: 添加脚本以复制部署 CLI 文件并更新构建命令

* refactor: 更新日志消息以提高可读性,统一英文提示信息

---------

Co-authored-by: Soulter <905617992@qq.com>
Co-authored-by: Copilot <copilot@github.com>
Co-authored-by: Weilong Liao <37870767+Soulter@users.noreply.github.com>
2.8 KiB
2.8 KiB
通过源码部署 AstrBot
Warning
你正在直接通过源码来部署本项目,该教程需要您具有一定的技术基础。
以下教程默认您的设备上已经安装 Python,并且版本
>=3.10
下载/克隆仓库
如果你的电脑上安装了 git,你可以通过以下命令来下载源码:
git clone https://github.com/AstrBotDevs/AstrBot
# 上面的代码默认会拉取最新的提交的源码,如果你需要拉取最新稳定发行版本的源码,可以使用以下命令:
# git clone --depth=1 --branch $(git ls-remote --tags --sort='-v:refname' https://github.com/AstrBotDevs/AstrBot.git | head -n1 | awk -F/ '{print $3}') https://github.com/AstrBotDevs/AstrBot.git
cd AstrBot
如果你没有安装 git,请先下载安装。
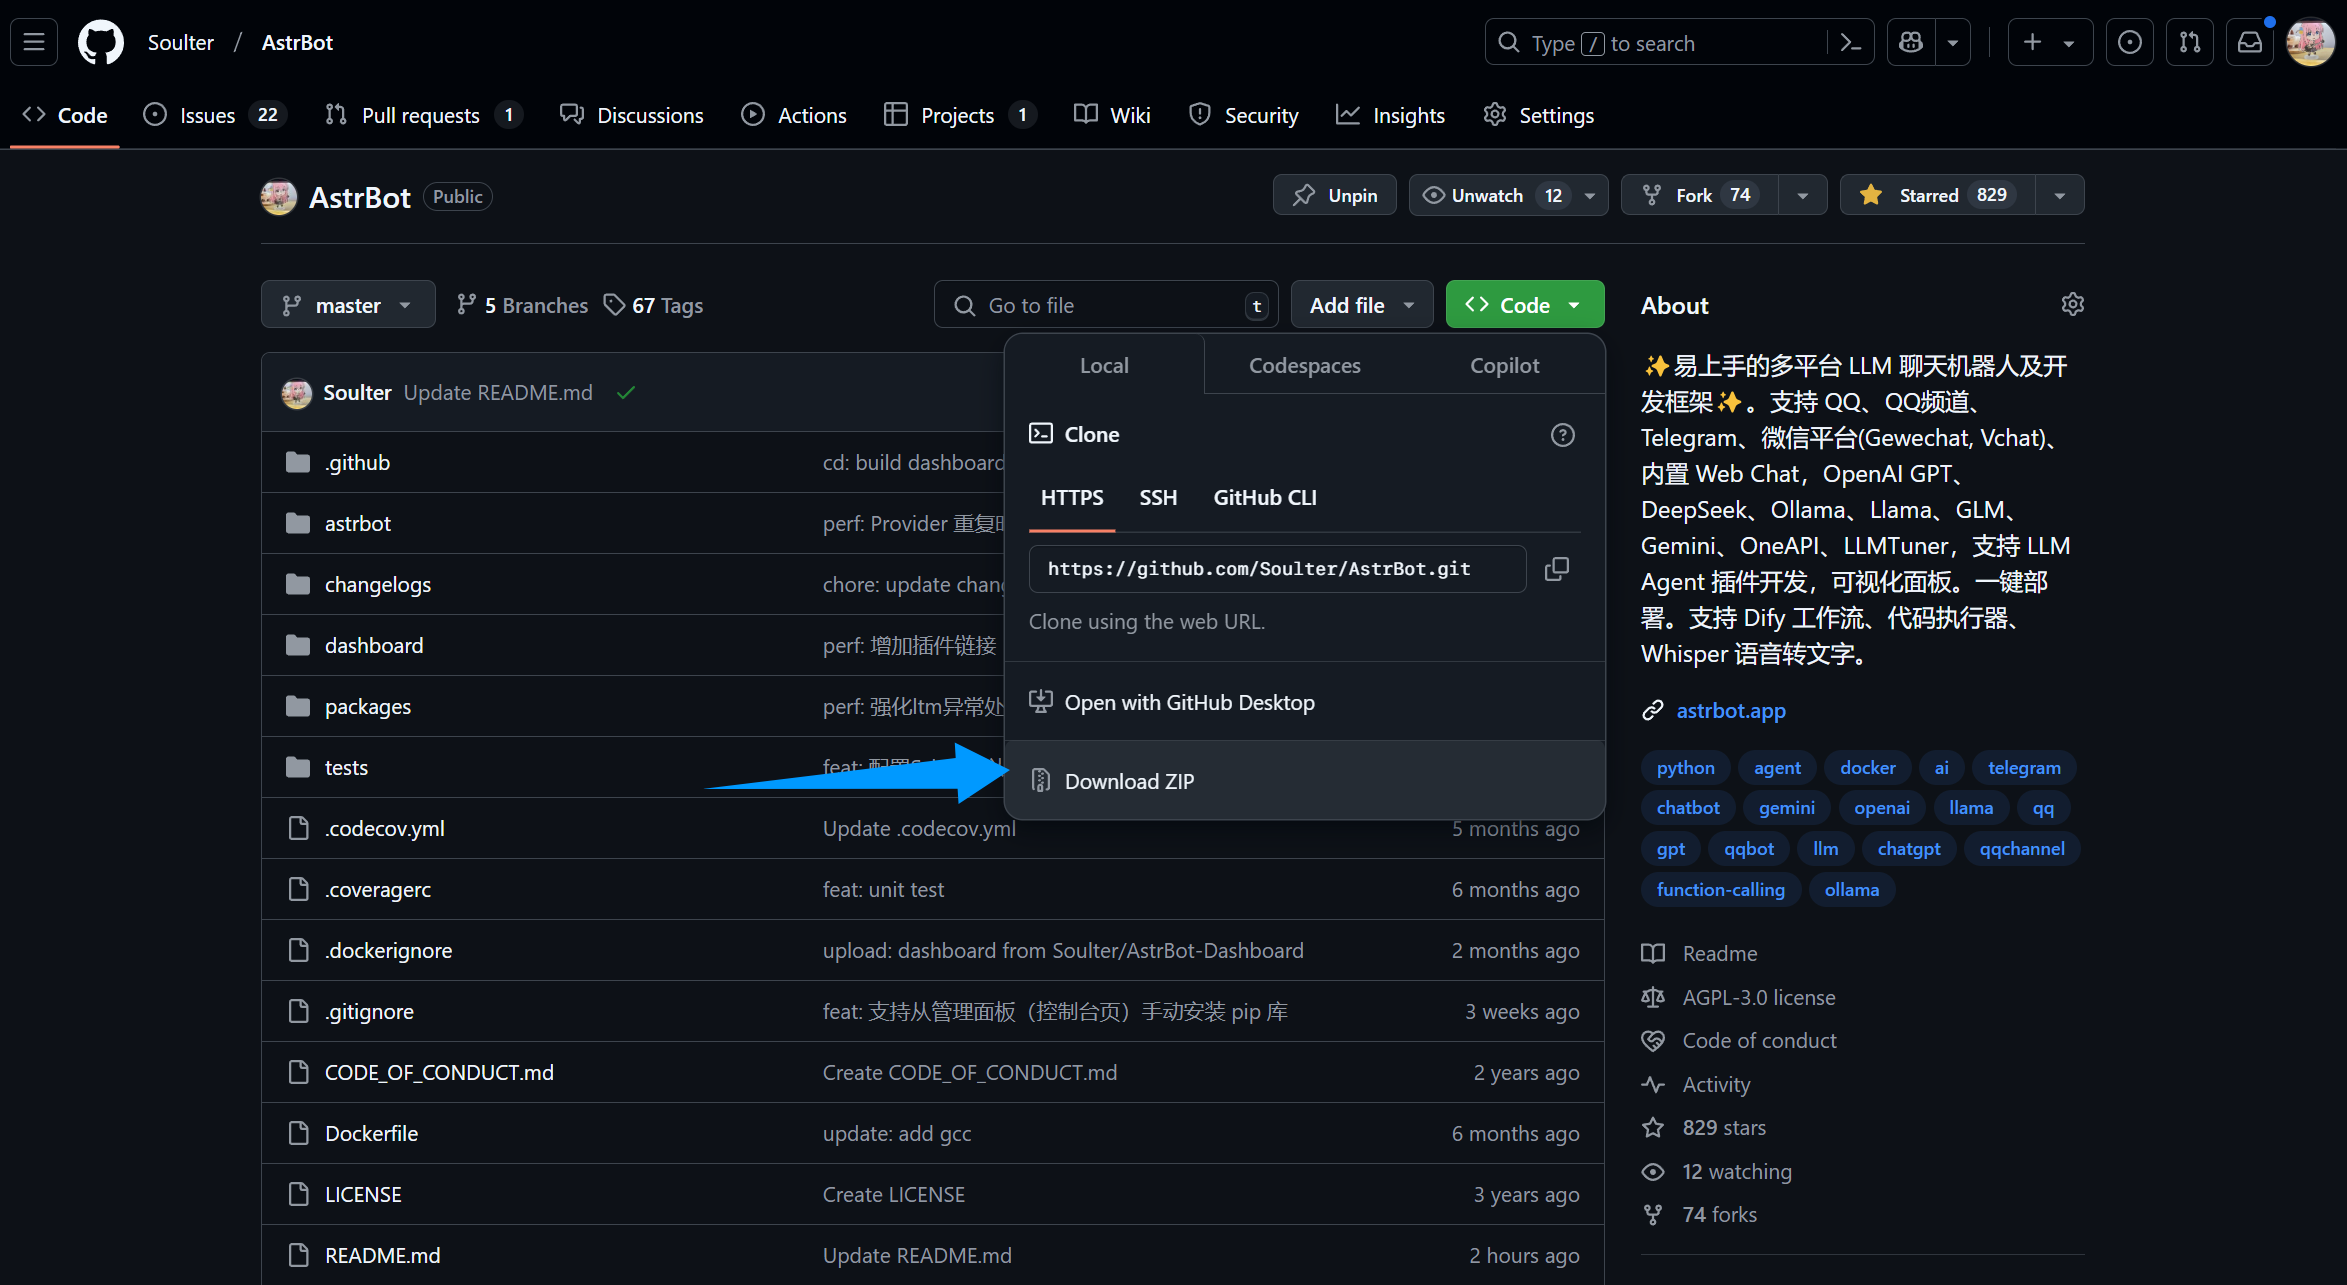
或者,直接从 GitHub 上下载源码解压:
安装依赖并运行
::: details 【🥳推荐】使用 uv 管理依赖
如果没安装
uv,请参考 Installing uv 安装。
- 在终端执行(AstrBot 目录下)
uv sync
uv run main.py
如果您安装了一些插件,建议后续启动附上 --no-sync 参数,以避免插件依赖库被重复安装。我们正在努力解决这个问题,敬请期待。
uv run --no-sync main.py
:::
::: details Python 内置 venv 安装依赖
在 AstrBot 源码目录下,使用终端运行以下命令:
如果是 Windows,直接下载源码解压的,请打开解压的文件夹,在地址栏输入:
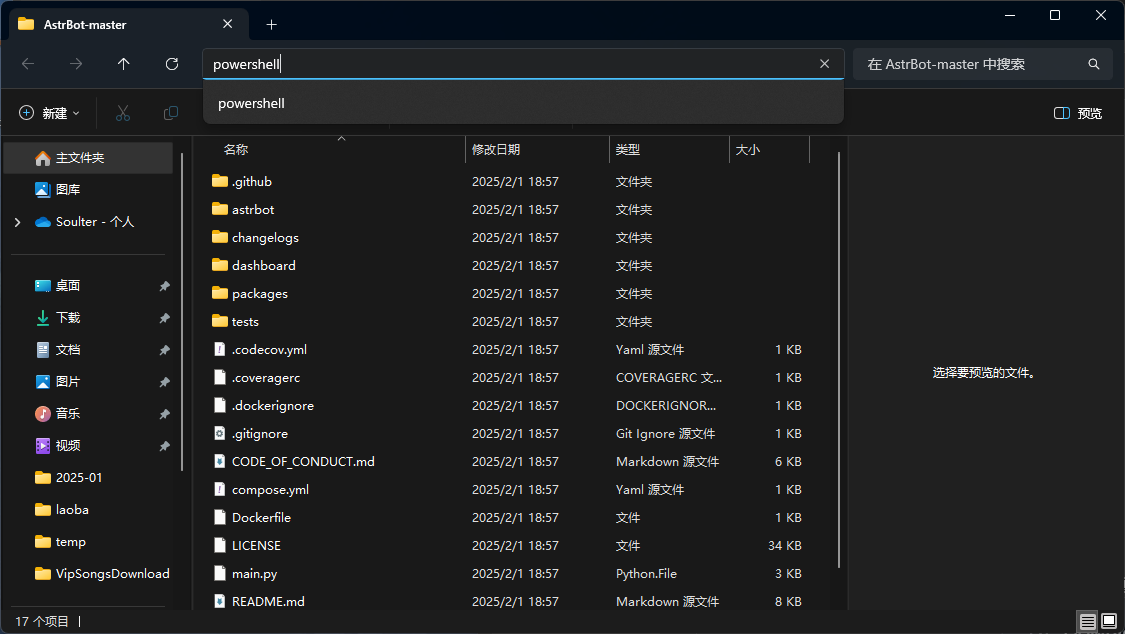
python3 -m venv ./venv
也可能是
python而不是python3
以上步骤会创建一个虚拟环境并激活(以免打乱您设备本地的 Python 环境)。
接下来,通过以下命令安装依赖文件,这可能需要花费一些时间:
Mac/Linux/WSL 执行:
source venv/bin/activate
python -m pip install -r requirements.txt -i https://mirrors.tuna.tsinghua.edu.cn/pypi/web/simple
python main.py
Windows 执行:
venv\Scripts\activate
python -m pip install -r requirements.txt -i https://mirrors.tuna.tsinghua.edu.cn/pypi/web/simple
python main.py
:::
🎉 大功告成!
如果一切顺利,你会看到 AstrBot 打印出的日志。
如果没有报错,你会看到一条日志显示类似 🌈 管理面板已启动,可访问 并附带了几条链接。打开其中一个链接即可访问 AstrBot 管理面板。链接是 http://localhost:6185。
Tip
如果你正在服务器上部署 AstrBot,需要将
localhost替换为你的服务器 IP 地址。默认用户名和密码是
astrbot和astrbot。
接下来,你需要部署任何一个消息平台,才能够实现在消息平台上使用 AstrBot。