 0a0c677404
* docs(community): 更新 QQ 群组信息
- 移除了旧的 QQ 群组信息并添加了新的群组。
- 确保所有群组信息的准确性和完整性。
- 提升文档的可读性和用户体验。

* docs(webui): 为忘记密码章节添加 FAQ 引用链接

- 在英文和中文文档的"忘记密码"章节末尾添加 TIP 提示框
- 提示框链接至对应 FAQ 条目,提供更详细的操作说明
- 增强文档之间的关联性,提升用户查阅体验

* docs(command): 新增 /stats 和 /provider 指令文档,更新 FAQ 管理员指令列表

- 在英文和中文的命令文档中添加 /stats 和 /provider 指令的详细使用说明
- 更新中英文 FAQ 页面的管理员指令列表,与最新的默认指令保持一致
- 确保中英文文档内容同步,提升文档准确性和用户查阅体验

* docs(websearch): 新增 Firecrawl 网页搜索提供商文档支持

- 在开发版配置文档中补充 websearch_provider 选项,加入 firecrawl 及对应密钥配置项
- 更新中英文网页搜索使用指南,将支持搜索源数量同步为五种并提供 Firecrawl 注册指引
- 确保中英文文档内容一致,提升配置说明的完整性和用户查阅体验

* docs(plugin-publish): 更新插件提交方式至新仓库

- 废弃通过 AstrBot 主仓库 Issue 提交插件的方式
- 新增警告框提示正确提交入口为 AstrBot_Plugins_Collection
- 同步更新中英文版插件发布文档
6.9 KiB
WebUI
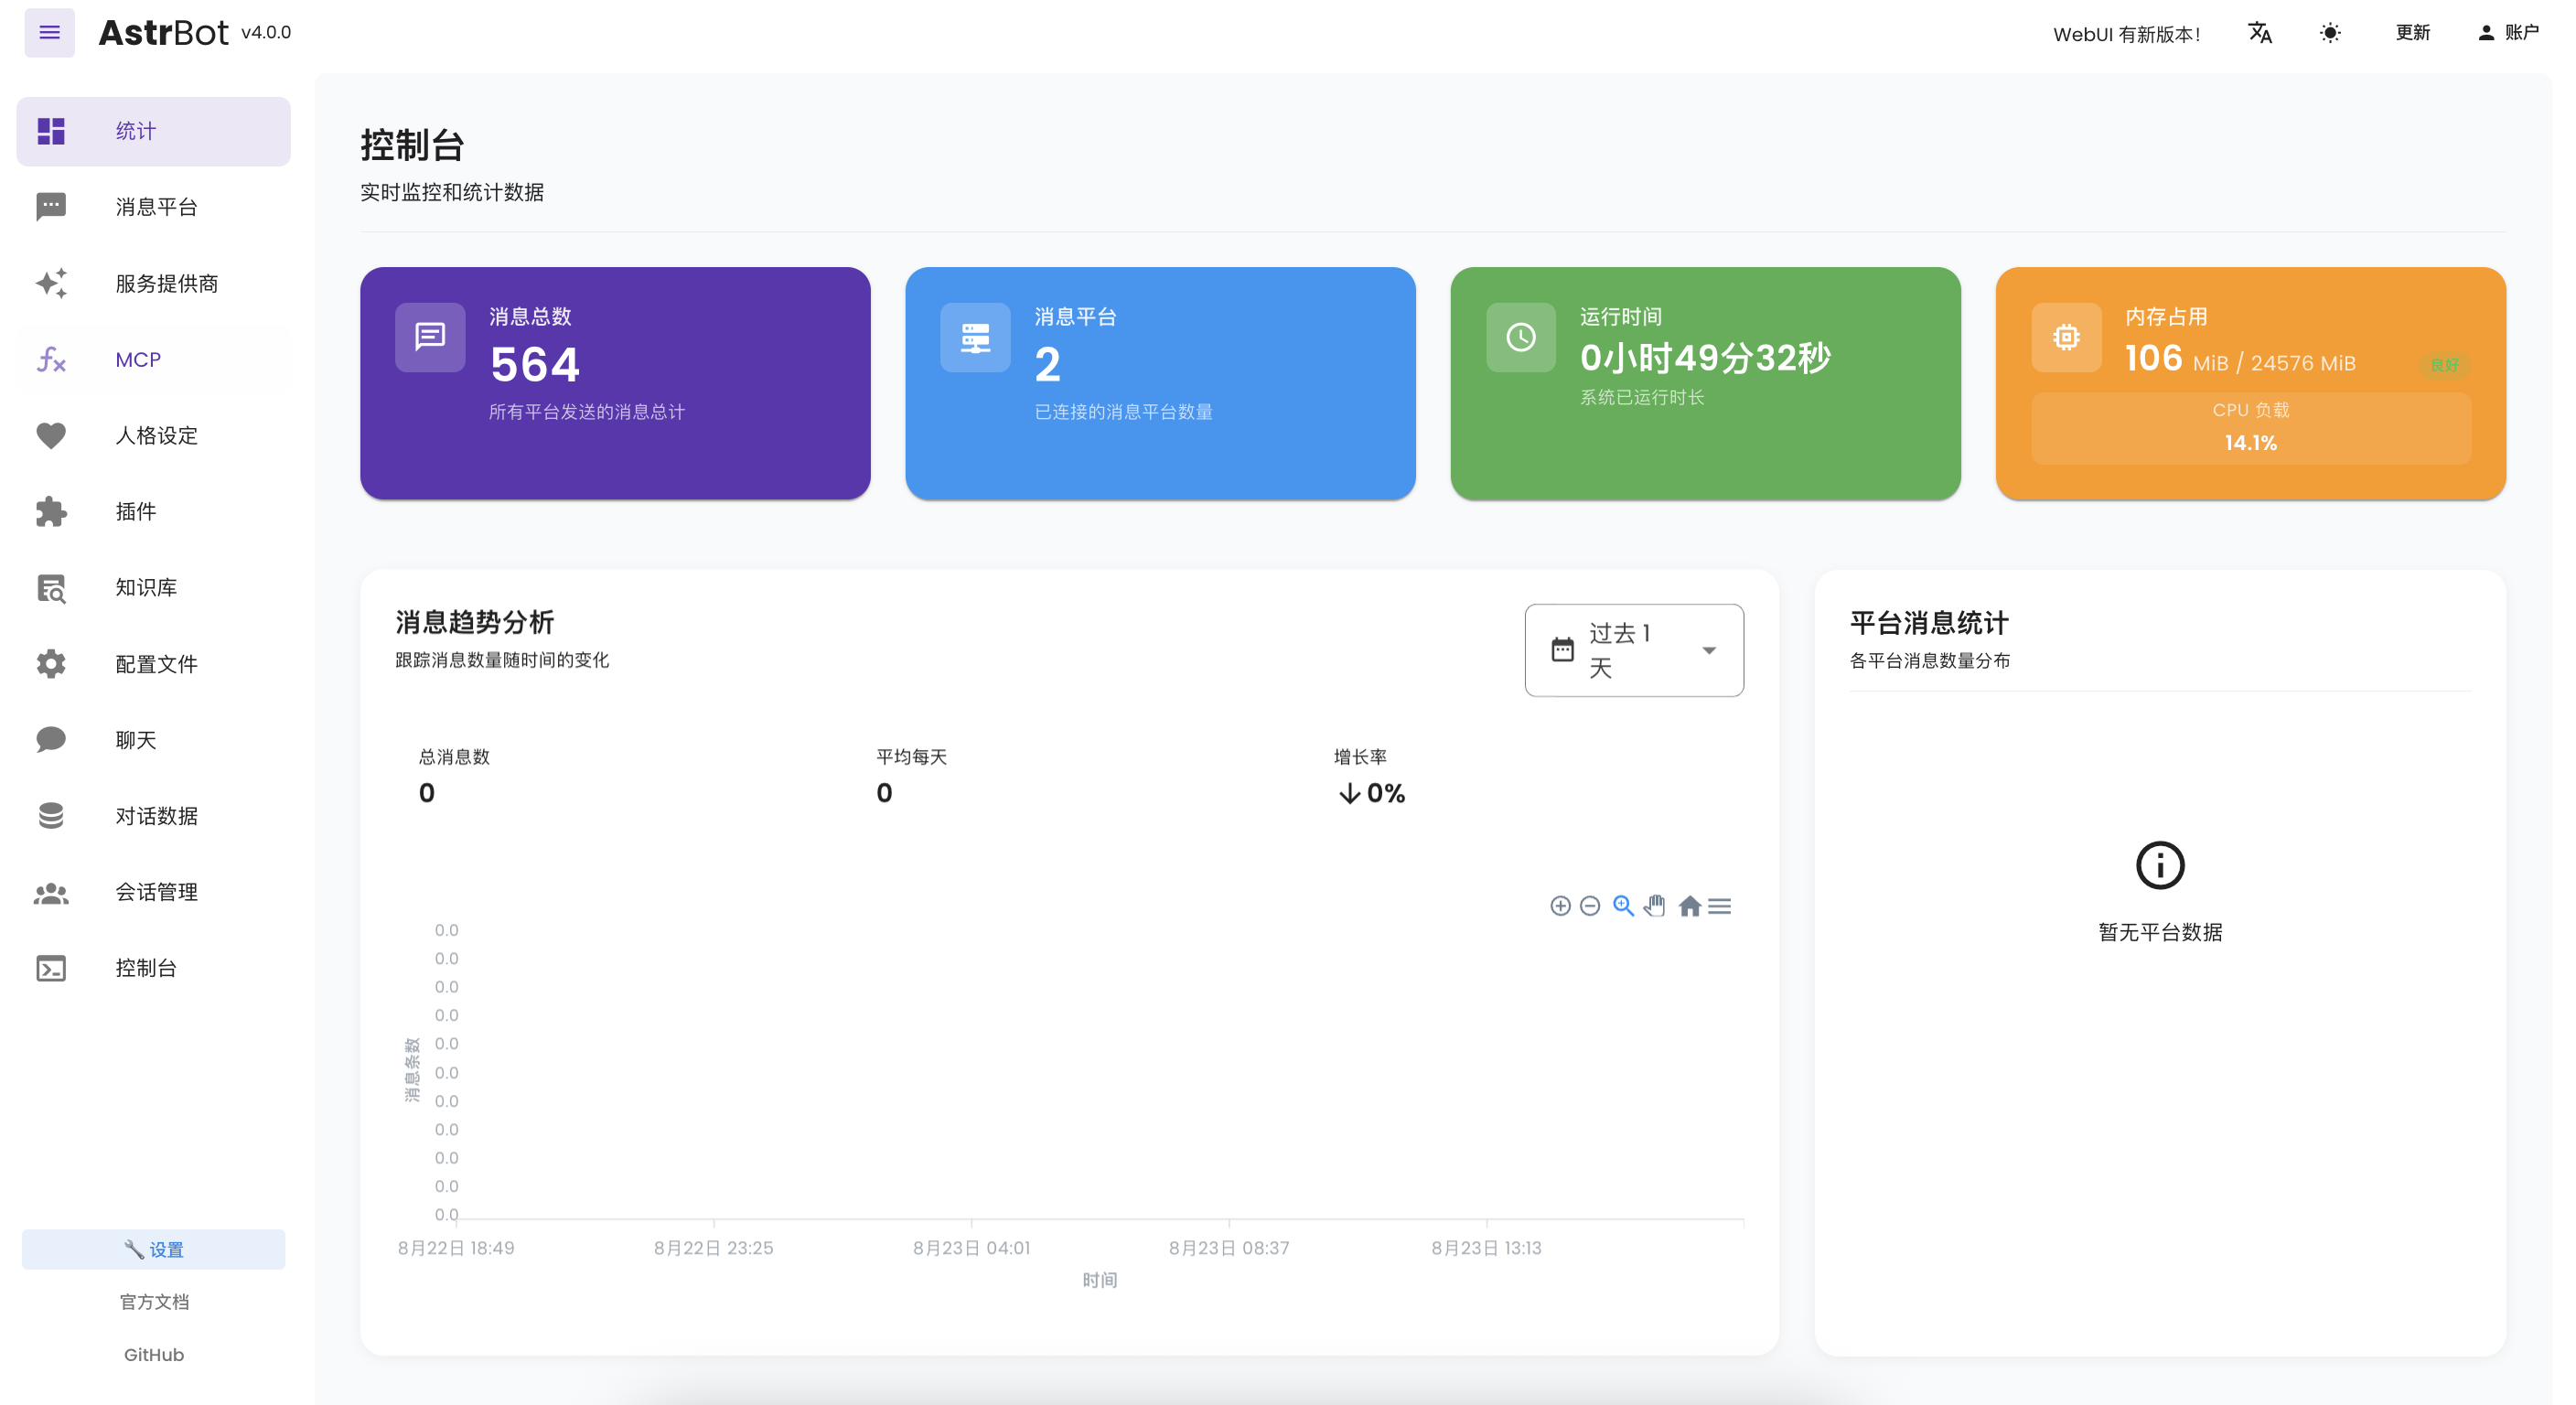
The AstrBot admin panel features plugin management, log viewing, visual configuration, statistics viewing, and more.
Accessing the Admin Panel
After starting AstrBot, you can access the admin panel by visiting http://localhost:6185 in your browser.
Tip
- If you're deploying AstrBot on a cloud server, replace
localhostwith your server's IP address.
Login
For first-time login, AstrBot generates a random initial password and prints it in startup logs. Please read the startup log line containing the WebUI credential and use that password to log in (username is usually astrbot).
Two-Factor Authentication
AstrBot WebUI supports TOTP (Time-based One-Time Password) based two-factor authentication.
Enabling Two-Factor Authentication
- In the left menu, click Config → System Config.
- Toggle on "Enable WebUI TOTP"; a setup dialog with a QR code will appear.
- Scan the QR code using any TOTP-compatible authenticator app (e.g., Google Authenticator, etc.).
- Enter the 6-digit verification code generated by the authenticator app to complete the verification.
- The system will generate recovery codes for logging in if the authenticator device is lost. Be sure to save them securely.
To replace the TOTP secret, you can do so in the TOTP management window, where you will need to verify the current TOTP code first.
Recovery Codes
- Each recovery code can be used only once. After logging in with a recovery code, two-factor authentication will be automatically disabled, and you will need to set it up again.
- Recovery codes can be regenerated in the TOTP management window.
- If you lose the recovery codes, you will not be able to regain account access through normal means. You will need to manually edit
data/cmd_config.json, setdashboard.totp.enabletofalse, and manually cleardashboard.totp.secretanddashboard.totp.recovery_code_hashto disable two-factor authentication.
Security Related
- Once two-factor authentication is enabled, modifying TOTP-related configurations requires verifying the current TOTP code to prevent unauthorized changes.
- Changing the admin panel password will revoke all trusted devices.
ChatUI
AstrBot includes a built-in ChatUI for talking to configured models directly in your browser.
ChatUI supports these common workflows:
- Create, rename, and delete conversations, and switch previous conversations from the sidebar.
- Select the config profile, model provider, and model on the chat page; if Provider session separation is enabled, you can also choose a model for the current session only.
- Send text, images, files, and voice input; uploaded attachments show previews and use file signature checks to help identify file types.
- View model thinking, tool-call status, knowledge-base or web-search references, and per-message token and latency statistics.
- Copy or regenerate existing replies, including regenerating with another model.
- Edit a user message and continue generation from that point, or start a thread from a specific excerpt.
- Switch between streaming/normal response modes and SSE/WebSocket transport modes.
Note
To keep message delivery ordered, keep only one ChatUI page open for the same browser session. If you open chat in multiple tabs, the system may ask you to reconnect.
Visual Configuration
In the admin panel, you can configure AstrBot's plugins through visual configuration. Click Configuration in the left sidebar to enter the configuration page.
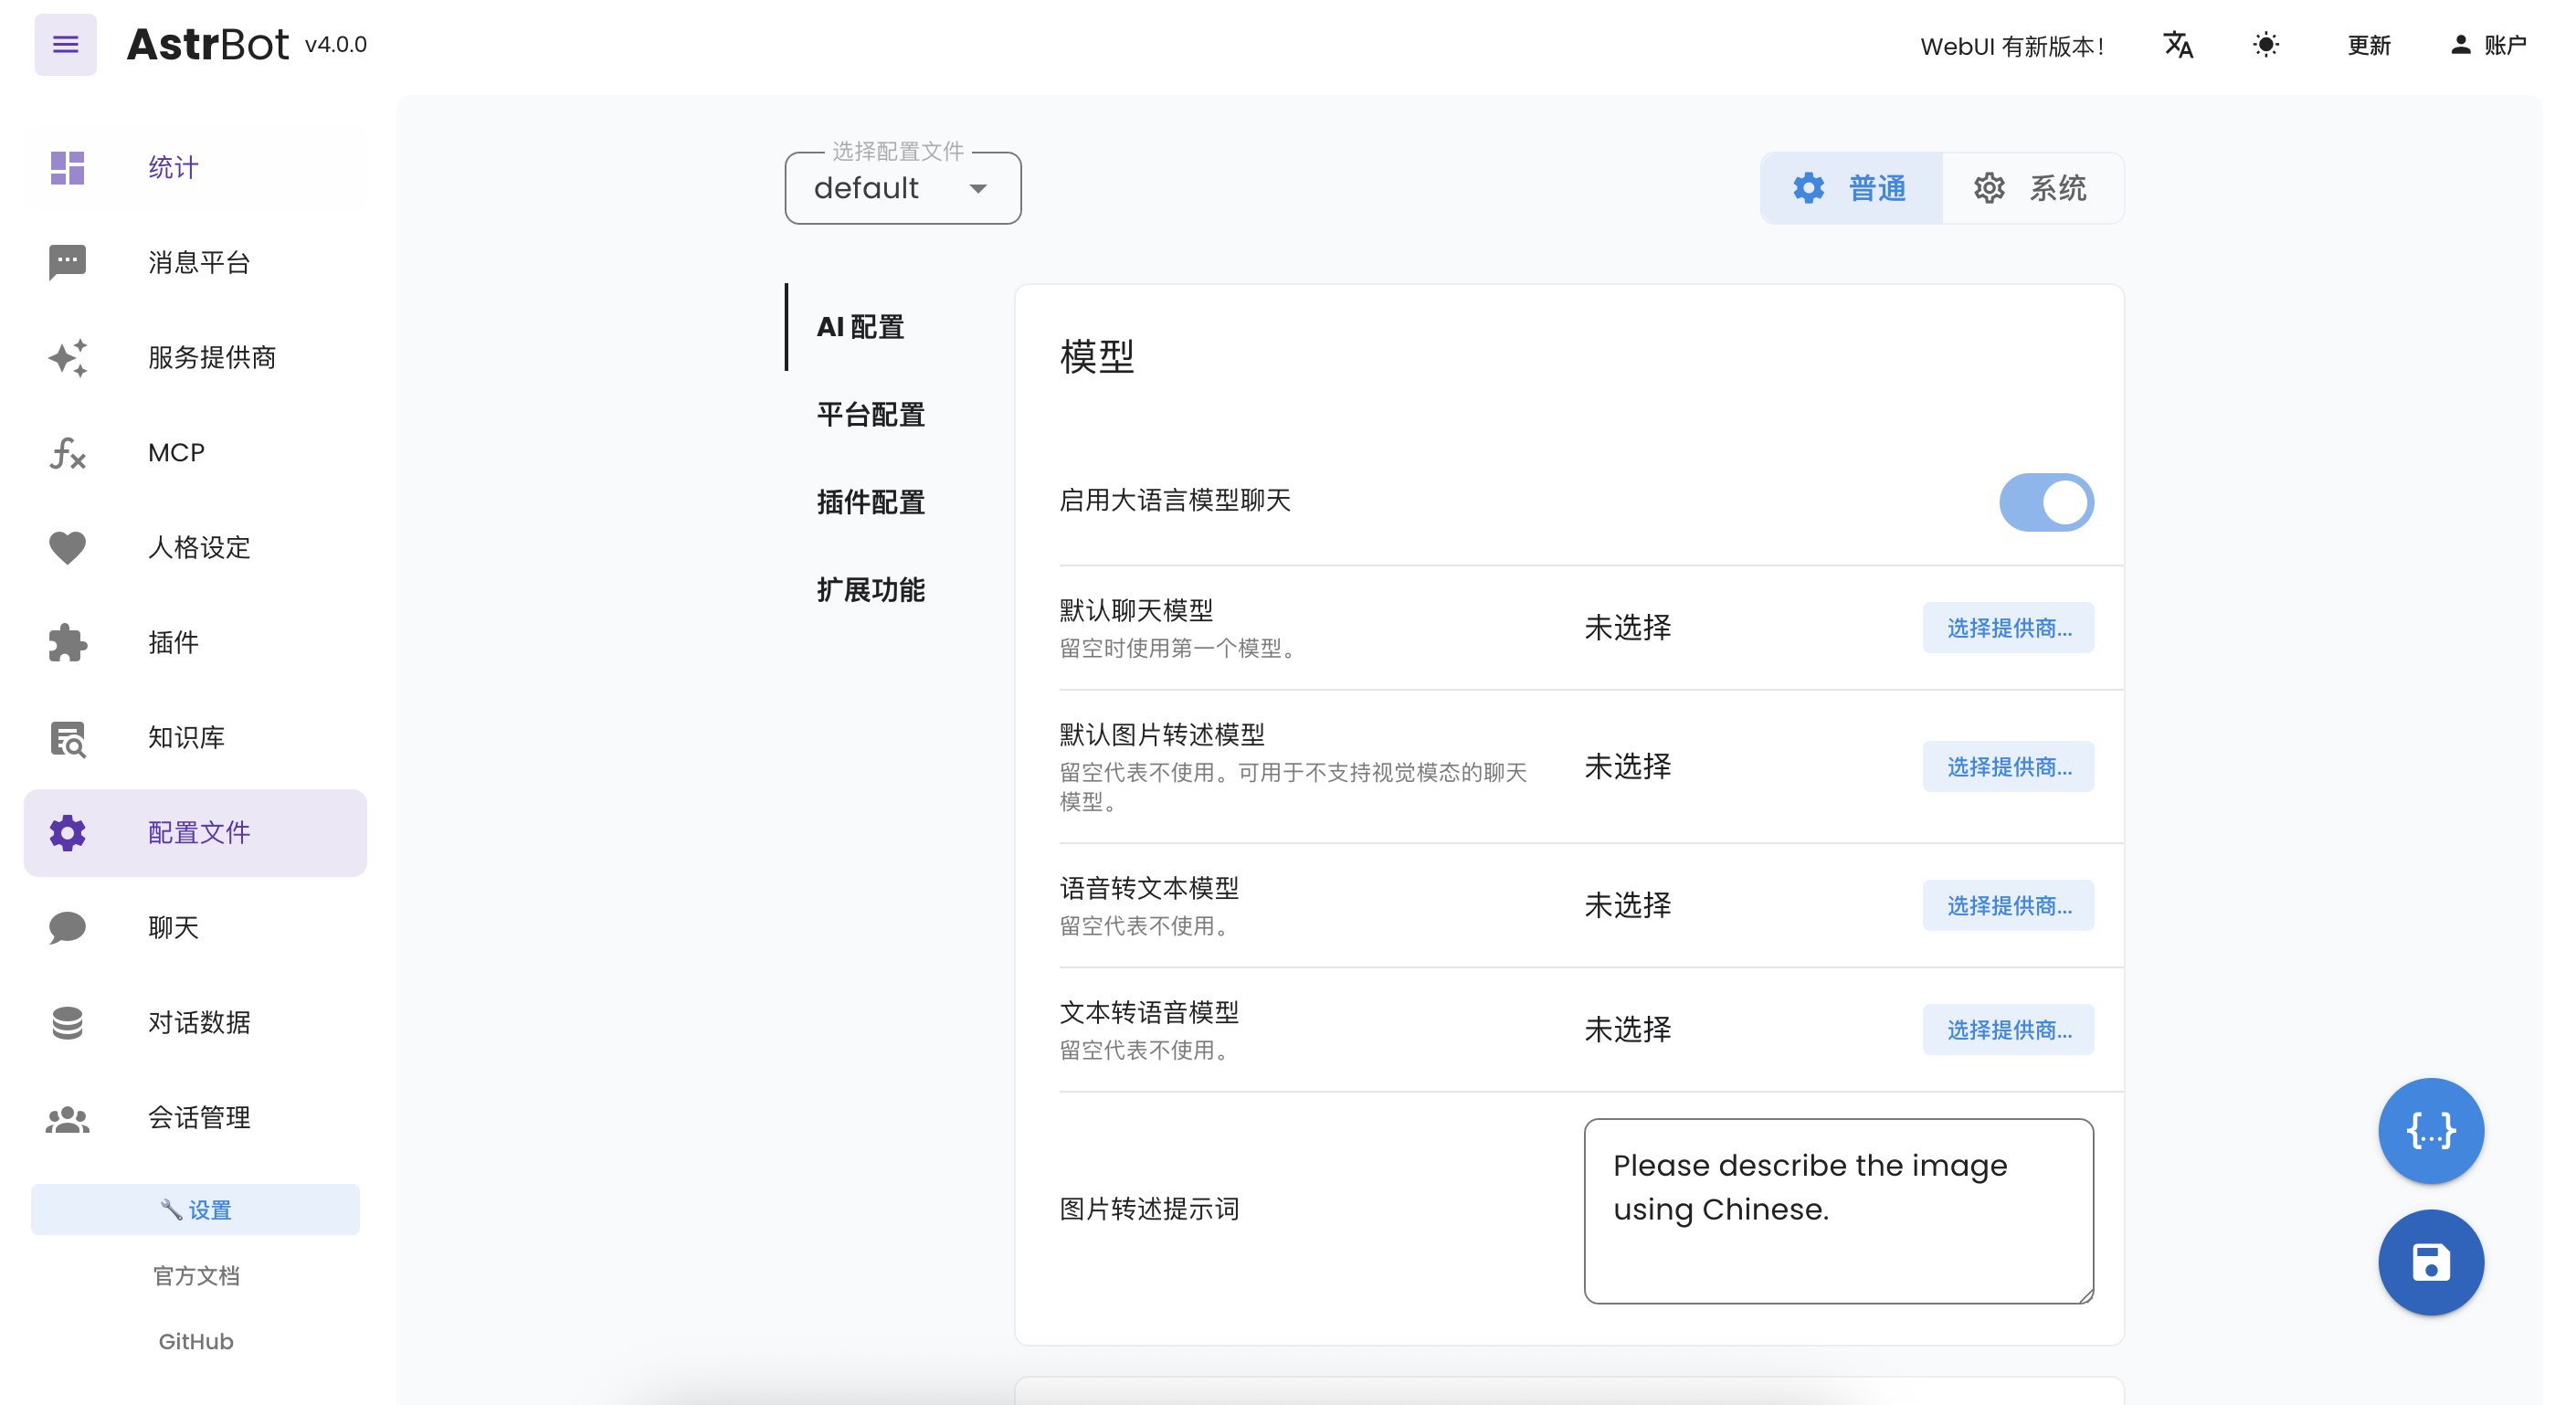
After modifying the configuration, you need to click the Save button in the bottom right corner to successfully save the configuration.
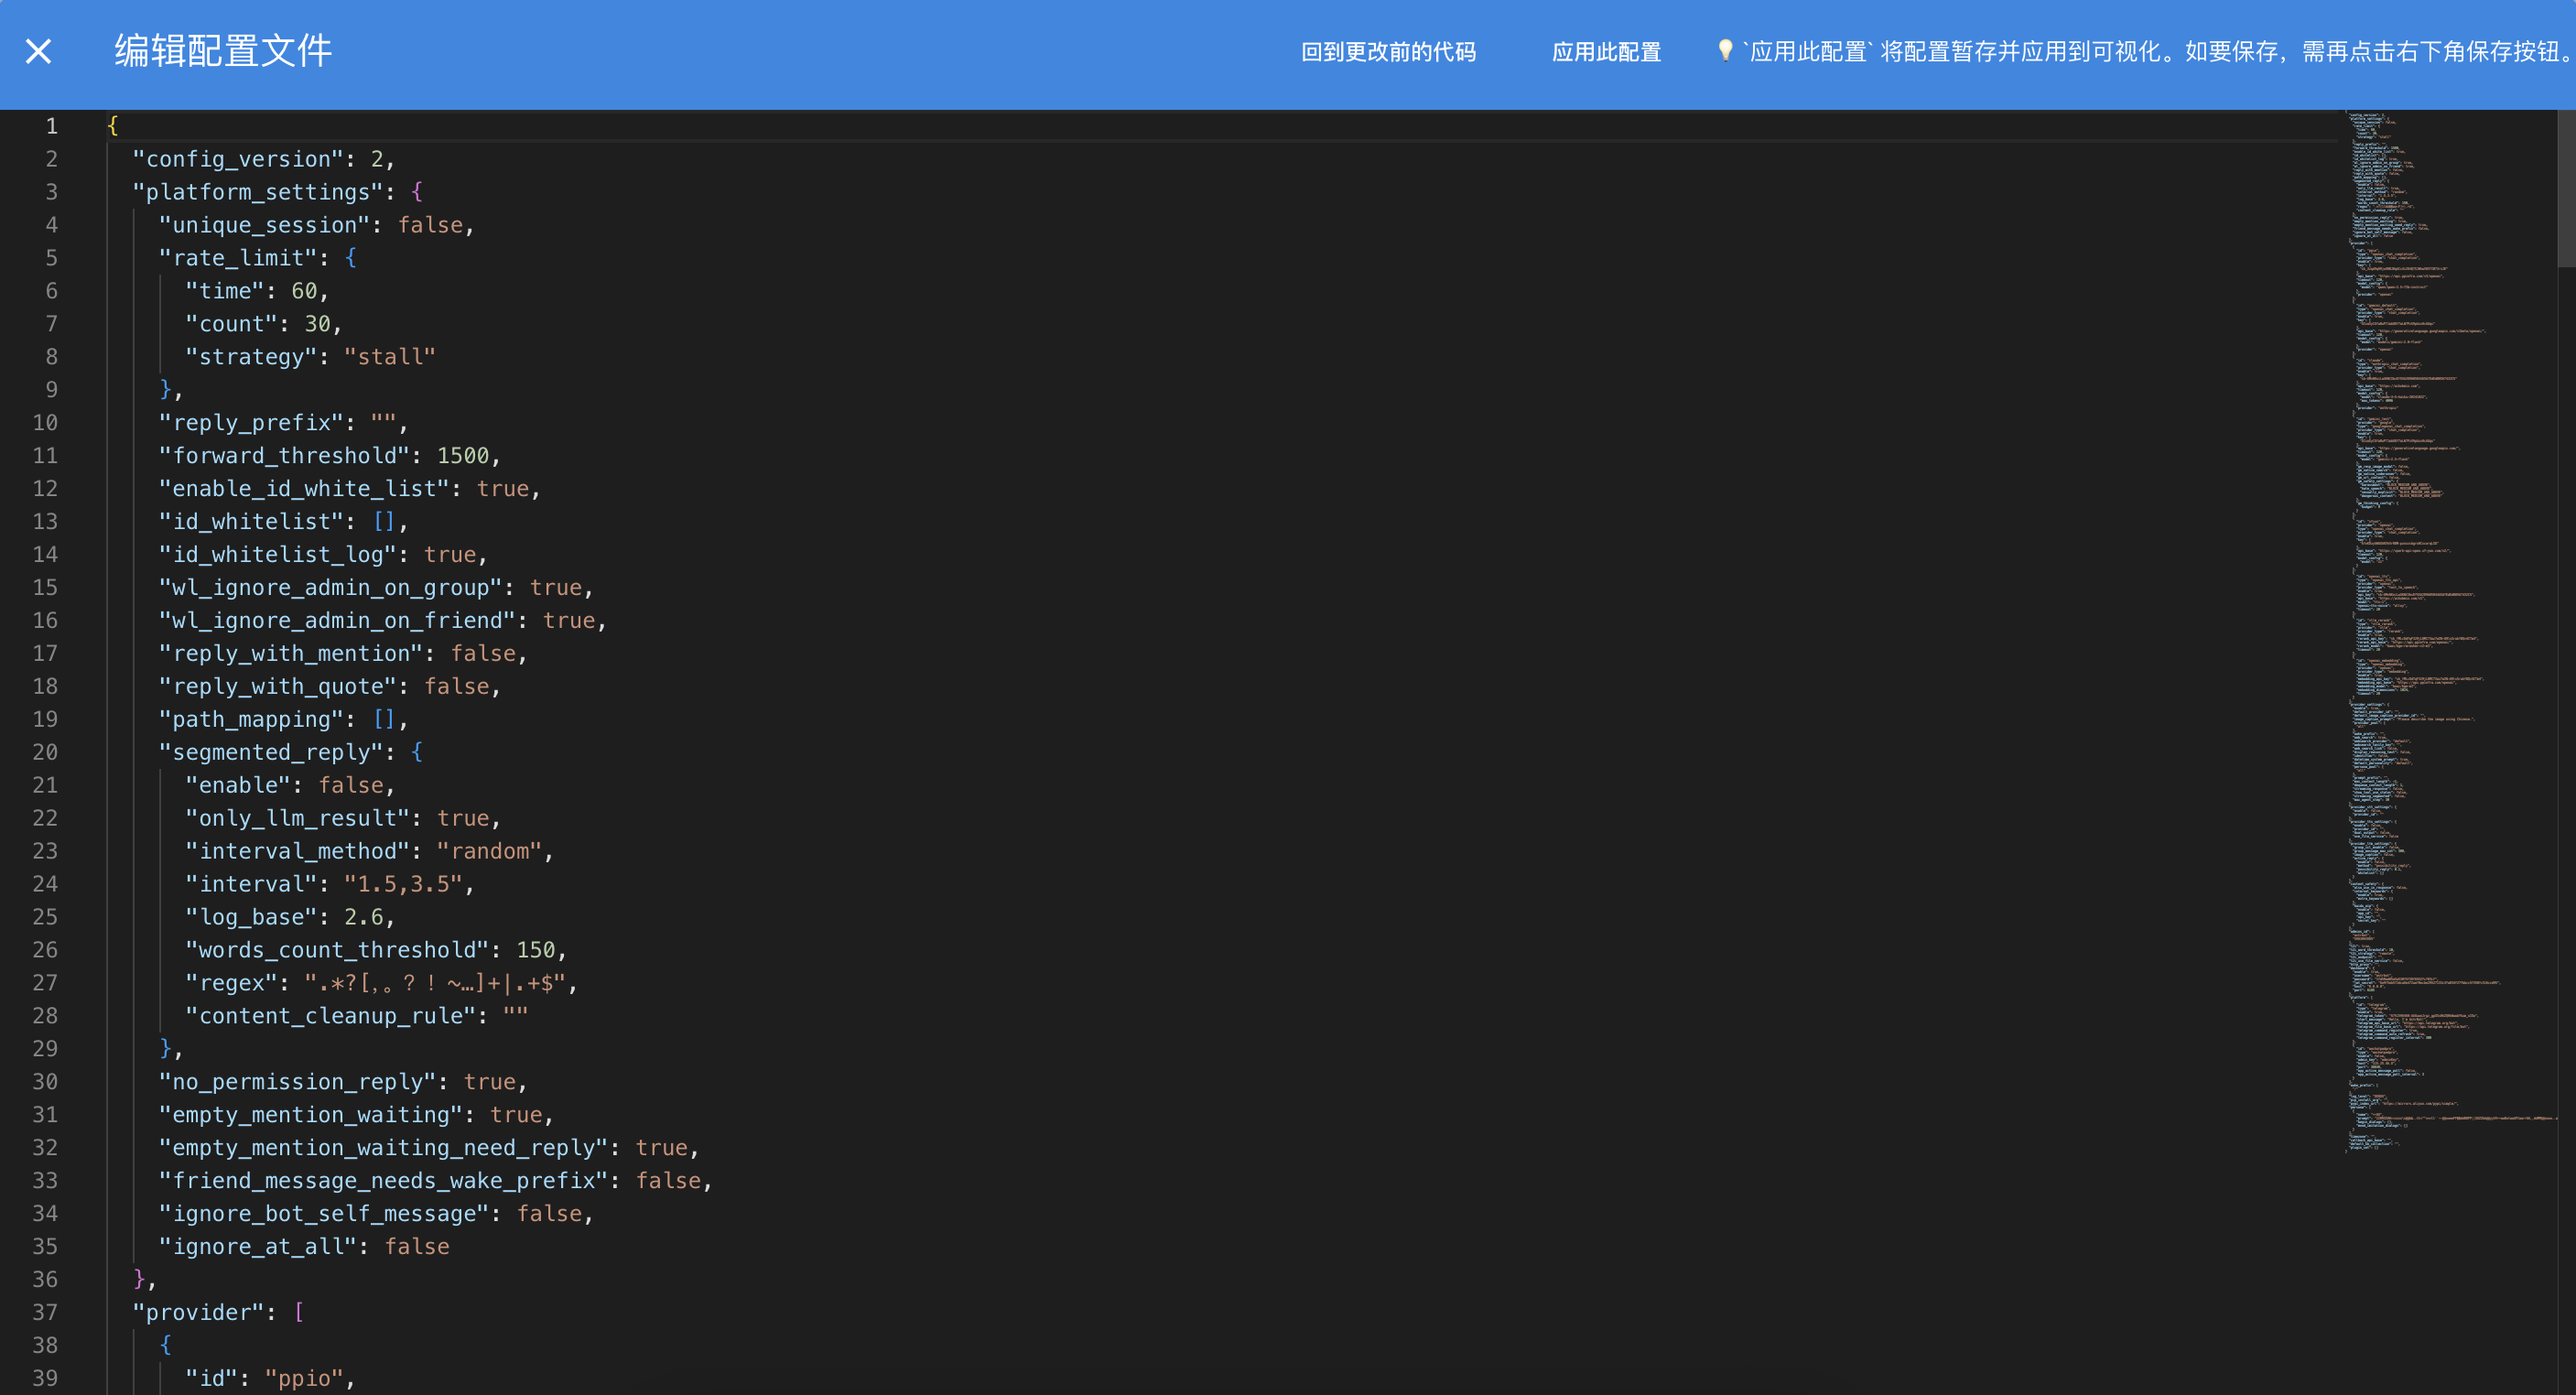
Use the first circular button in the bottom right corner to switch to Code Edit Configuration. In Code Edit Configuration, you can directly edit the configuration file.
After editing, first click Apply This Configuration, which will apply the configuration to the visual configuration, then click the Save button in the bottom right corner to save the configuration. If you don't click Apply This Configuration, your modifications won't take effect.
Plugins
In the admin panel, you can view installed plugins and install new plugins through the Plugins section in the left sidebar.
Click the Plugin Market tab to browse plugins officially listed by AstrBot.
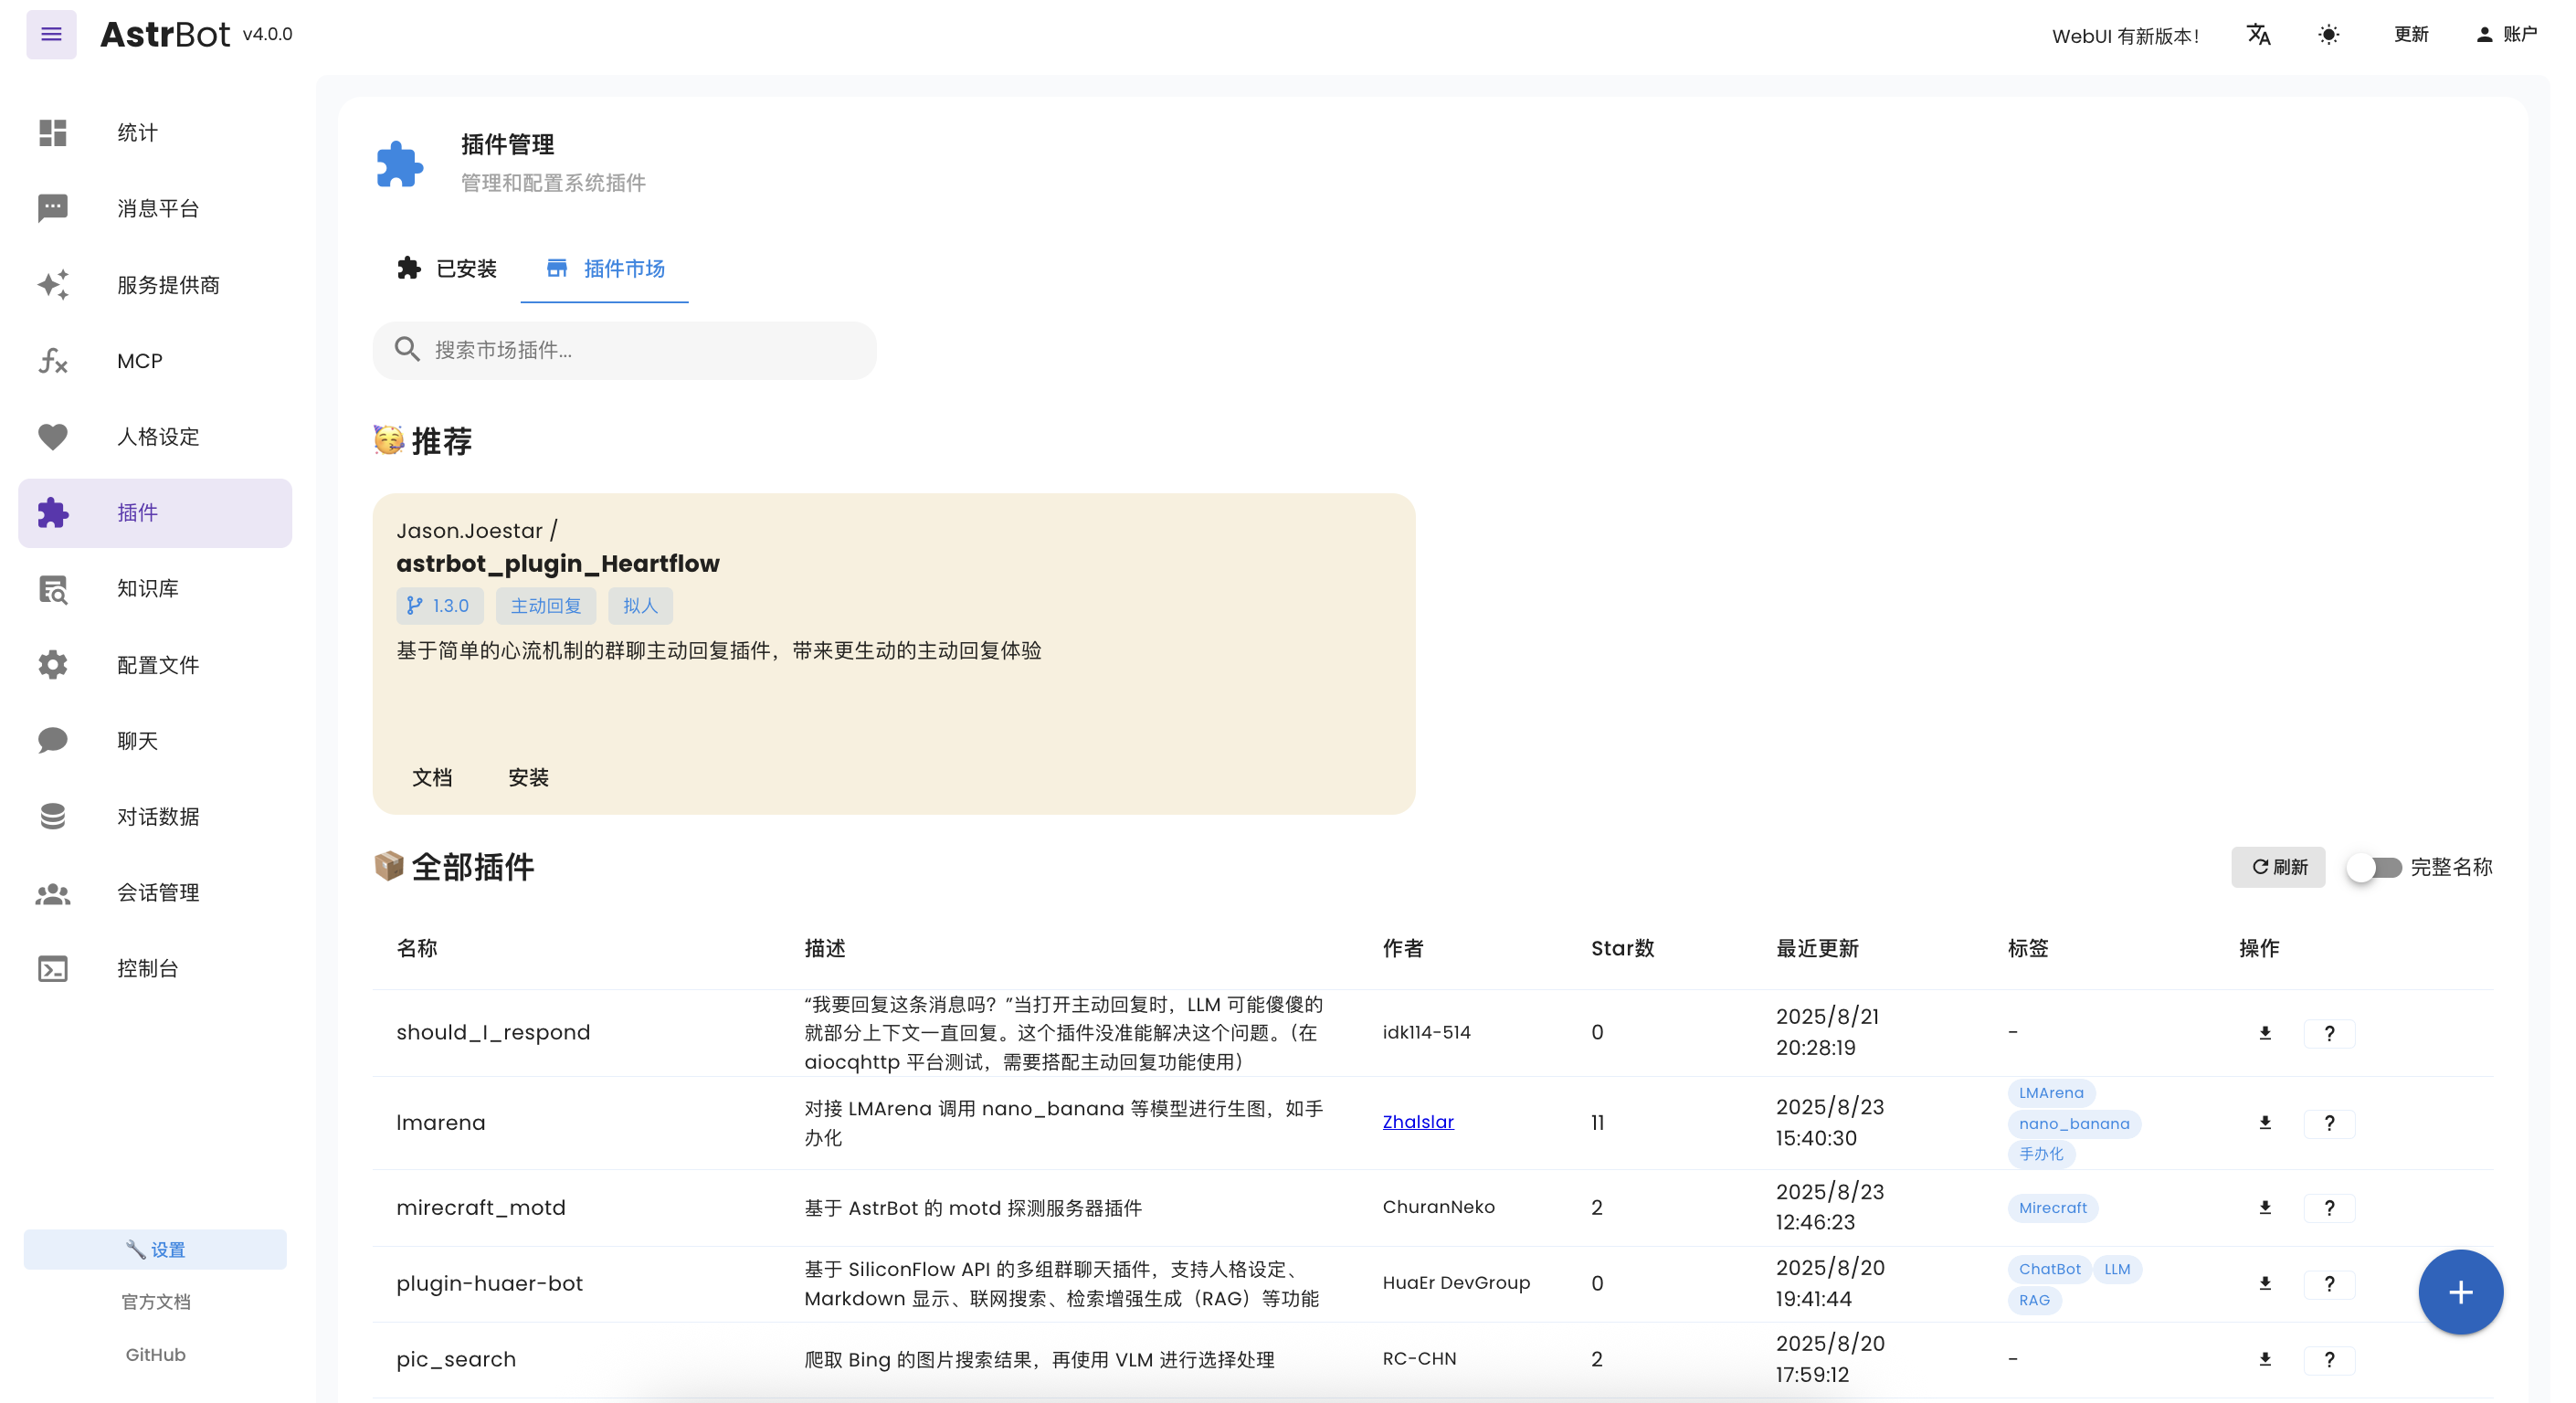
You can also click the + button in the bottom right corner to manually install plugins via URL or file upload.
Due to the plugin update mechanism, the AstrBot Team cannot fully guarantee the security of plugins in the plugin market. Please carefully verify them. The AstrBot Team is not responsible for any losses caused by plugins.
Handling Plugin Load Failures
If a plugin fails to load, the admin panel will display the error message and provide a "Try one-click reload fix" button. This allows you to quickly reload the plugin after fixing the environment (e.g., installing missing dependencies) or modifying the code, without having to restart the entire application.
Command Management
Use the Command Management menu on the left to centrally manage all registered commands; system plugins are hidden by default.
Filter by plugin, type (command / command group / subcommand), permission, and status, and combine with the search box for quick lookup. Command group rows can expand to show subcommands, badges display the subcommand count, and subcommand rows are indented to indicate hierarchy.
You can enable/disable and rename each command.
Trace
In the Trace page of the admin panel, you can view the real-time execution trace of AstrBot. This is useful for debugging model call paths, tool invocation processes, etc.
You can enable or disable trace recording using the switch at the top of the page.
Note
Currently only recording partial model call paths from AstrBot main Agent. More coverage will be added.
Updating the Admin Panel
When AstrBot starts, it automatically checks if the admin panel needs updating. If it does, the first log entry (in yellow) will prompt you.
Use the /dashboard_update command to manually update the admin panel (admin command).
Admin panel files are located in the data/dist directory. If you need to manually replace them, download dist.zip from https://github.com/AstrBotDevs/AstrBot/releases/ and extract it to the data directory.
Customizing WebUI Port
Modify the port in the dashboard configuration in the data/cmd_config.json file.
Forgot Password
Modify the password in the dashboard configuration in the data/cmd_config.json file and delete the entire password key-value pair.
Tip
For more details, see FAQ - Forgot Dashboard Password.