mirror of
https://github.com/AstrBotDevs/AstrBot
synced 2026-07-17 09:50:31 +08:00
 55af880369
* feat(qqofficial): support webhook QR setup

* docs(qqofficial): simplify webhook QR setup step
147 lines
6.1 KiB
Markdown
147 lines
6.1 KiB
Markdown
# Connect QQ via QQ Official Bot (Webhook)
|
|
|
|
> [!WARNING]
|
|
> 1. QQ Official Bot currently requires an IP whitelist.
|
|
> 2. Webhook mode requires a server with a public IP, a domain, and HTTPS access.
|
|
> 3. It supports group chat, private chat, channel chat, and channel private chat.
|
|
|
|
## Supported Basic Message Types
|
|
|
|
> Version v4.19.6.
|
|
|
|
| Message Type | Receive | Send | Notes |
|
|
| --- | --- | --- | --- |
|
|
| Text | Yes | Yes | |
|
|
| Image | Yes | Yes | |
|
|
| Voice | Yes | Yes | |
|
|
| Video | Yes | Yes | |
|
|
| File | Yes | Yes | |
|
|
|
|
Proactive message push: Supported.
|
|
|
|
## Create a QQ Bot in AstrBot with One-click QR Setup (Recommended)
|
|
|
|
### Setup Flow
|
|
|
|
1. In AstrBot WebUI, click `Bots` in the left sidebar, then click `+ Create Bot`.
|
|
2. Select `QQ Official Bot (Webhook)`.
|
|
3. Under `Choose setup method`, select `One-click QR setup`, click start, then scan the QR code with mobile QQ.
|
|
4. After confirming the QR binding, click `Save`.
|
|
5. Configure DNS and a reverse proxy for your server so HTTPS requests are forwarded to AstrBot's `6185` port.
|
|
6. Go back to the QQ Open Platform bot management page, open `Development -> Callback Configuration`, and enter the Webhook callback URL generated by AstrBot.
|
|
7. Select the callback events you need. To receive full group messages, make sure the group event `GROUP_MESSAGE_CREATE` is selected.
|
|
8. Save the callback configuration, then restart AstrBot.
|
|
|
|
> [!TIP]
|
|
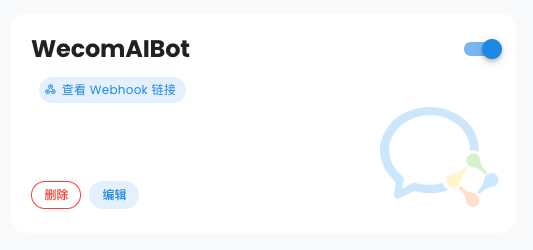
> With `Unified Webhook Mode`, AstrBot generates a unique Webhook callback URL automatically. You can find it in the logs or on the bot card in WebUI.
|
|
|
|
|
|
|
|
### Use in Group Chats
|
|
|
|
#### Add to a Group Chat
|
|
|
|
Open the created QQ bot profile page (mobile QQ -> Contacts -> Bots tab). You can find `Add to group chat` near the bottom. Currently, the bot can only be added to groups where you are the group owner.
|
|
|
|
#### Set Message Access Scope and Proactive Speaking
|
|
|
|
In mobile QQ group settings, open the bot settings page. We recommend setting `Messages the bot can access` to `All group messages`, and enabling `Allow the bot to proactively speak in the group`.
|
|
|
|
With this configuration, the bot can receive full group messages and proactively push messages to the group, such as scheduled task notifications and plugin notifications.
|
|
|
|
Webhook mode also requires selecting the group event `GROUP_MESSAGE_CREATE` in QQ Open Platform callback configuration. Otherwise, AstrBot cannot receive full group message events.
|
|
|
|

|
|
|
|
## Manually Apply for a QQ Bot (Not Recommended)
|
|
|
|
### Apply for a Bot
|
|
|
|
Open [QQ Official Bot](https://q.qq.com) and sign in.
|
|
|
|
Create a bot, fill in name/description/avatar, then submit for review. After security verification passes, creation is complete.
|
|
|
|
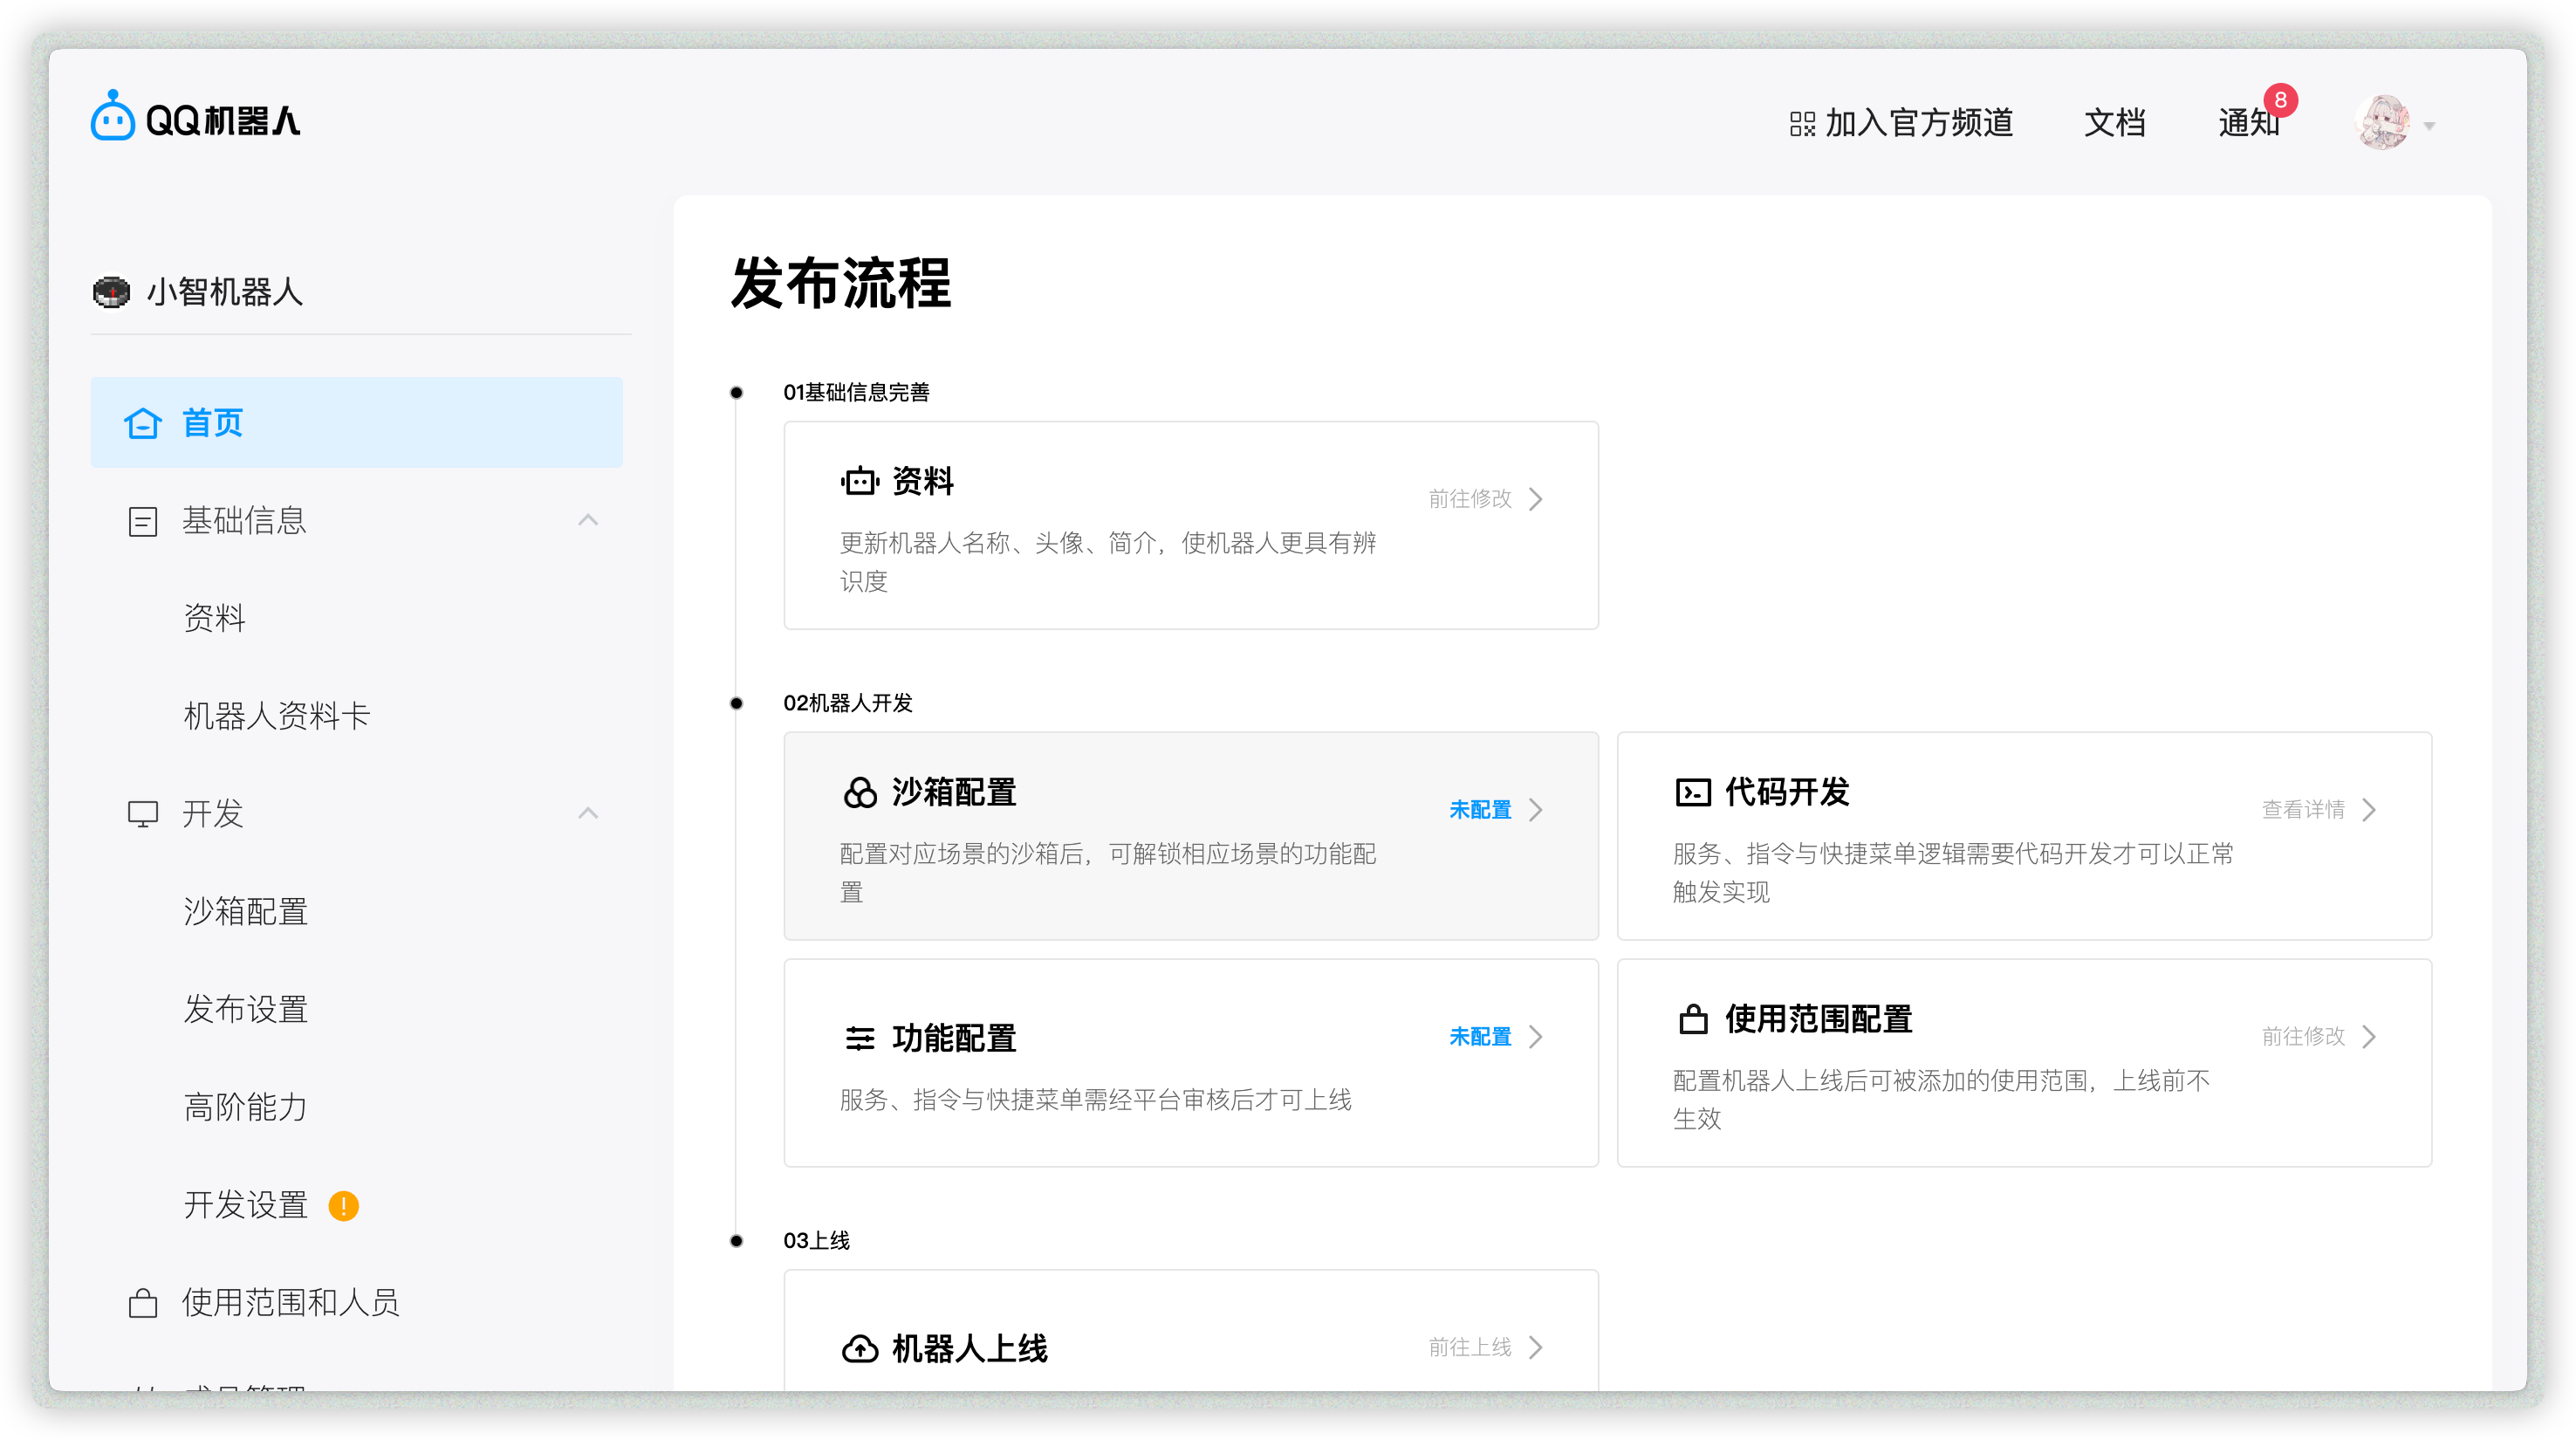
Open the created bot to enter its management page:
|
|
|
|
|
|
|
|
### Allow Bot in Channel / Group / Private Chat
|
|
|
|
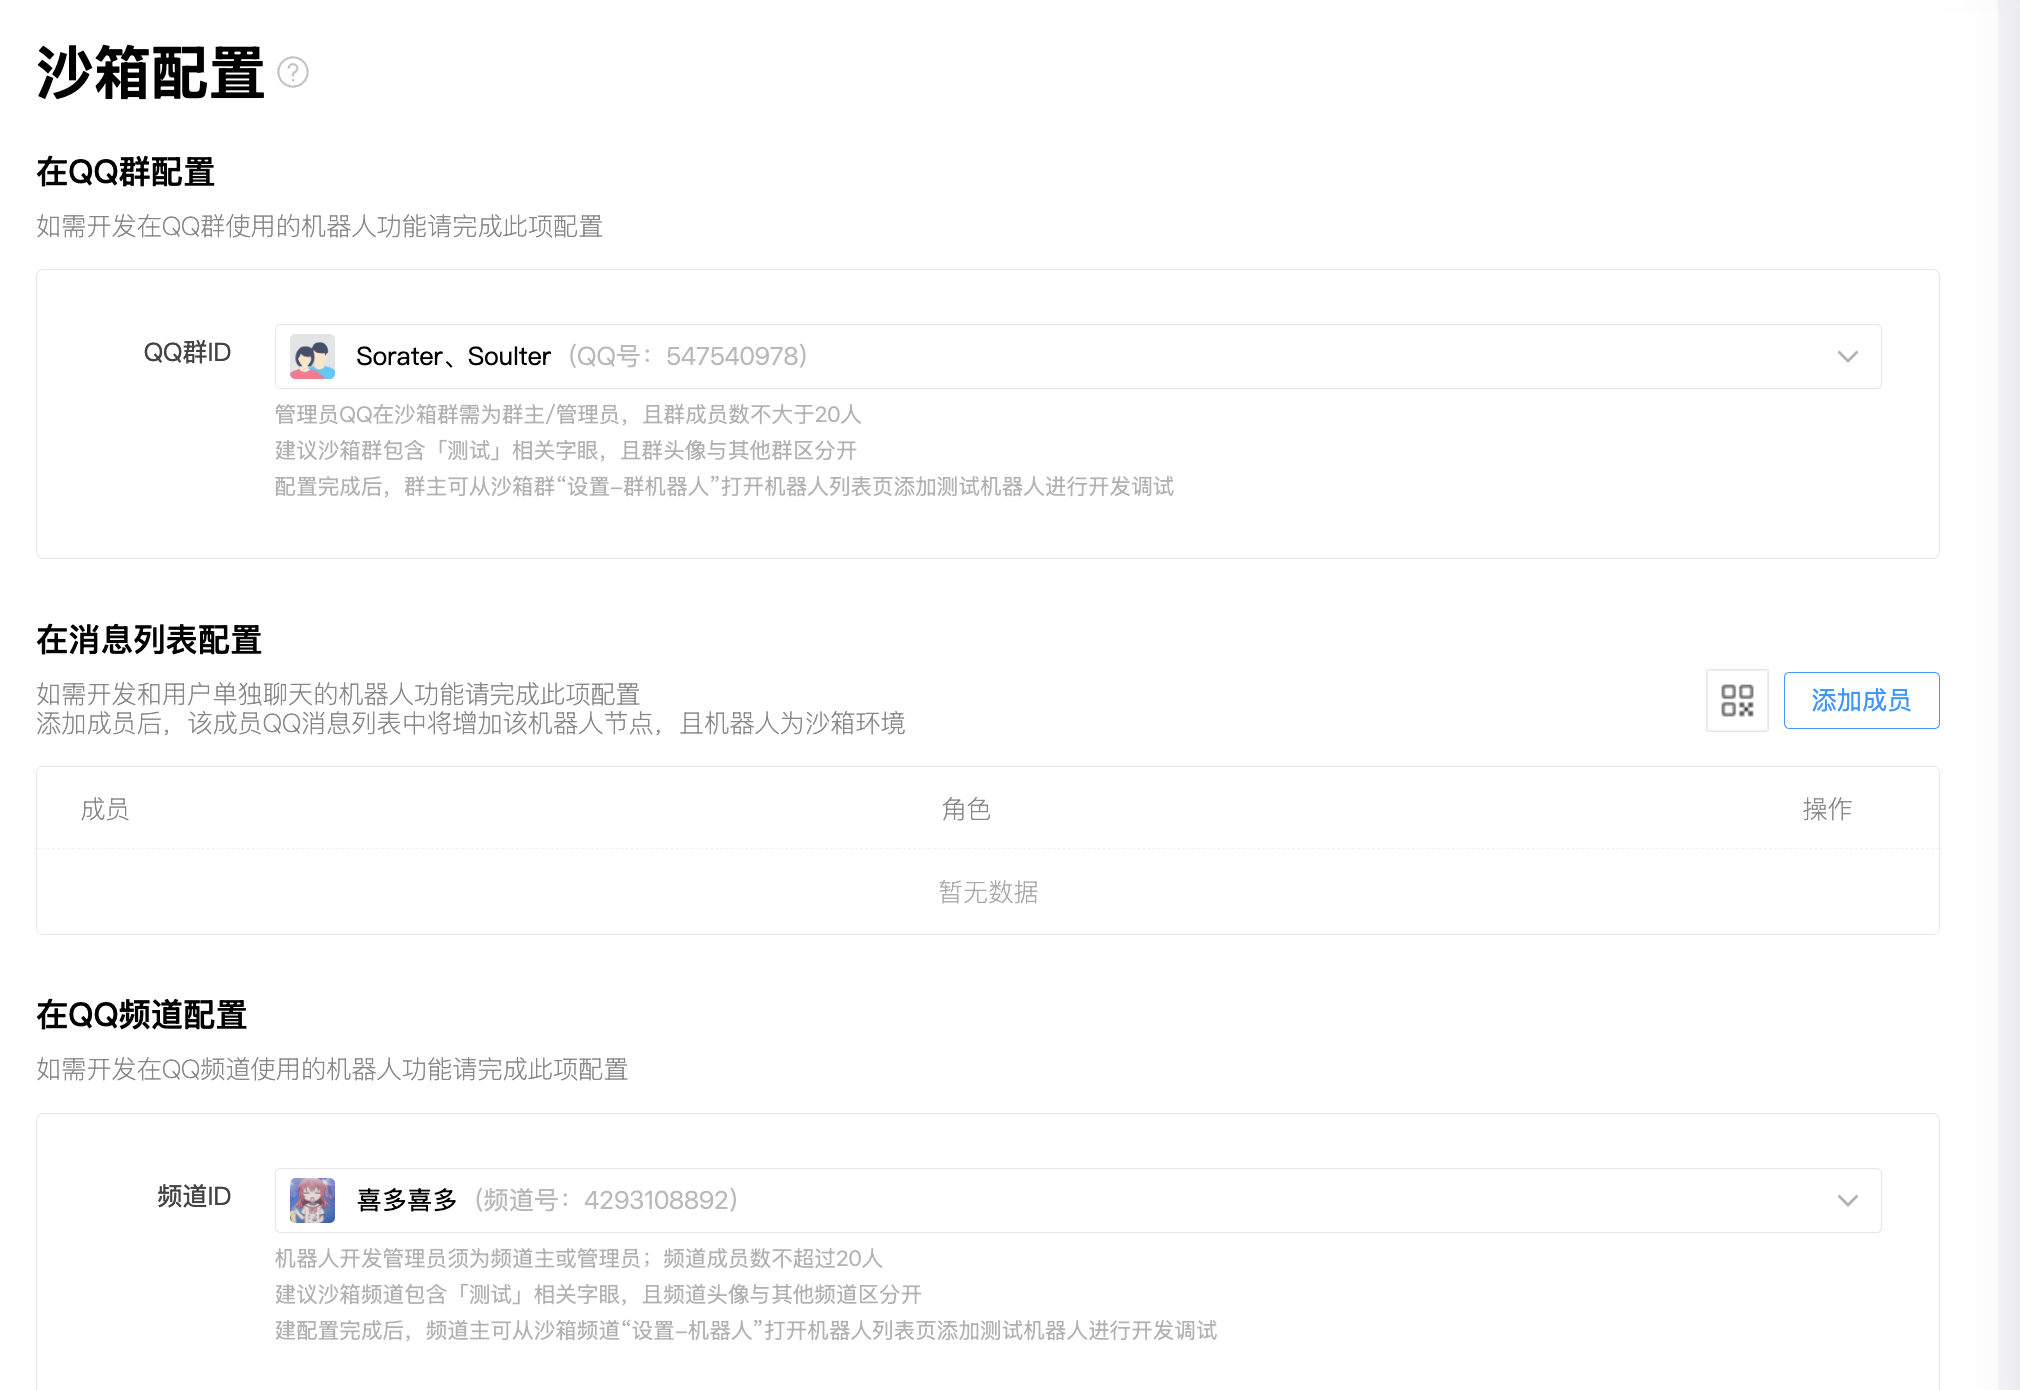
Open `Sandbox Configuration` to set a sandbox channel / QQ group / QQ private chat (up to 20 members).
|
|
|
|
Then configure QQ groups, private chat QQ accounts, and QQ channels as needed.
|
|
|
|
|
|
|
|
### Get `appid` and `secret`
|
|
|
|
After adding the bot where you need it, open `Development -> Development Settings`, then copy `appid` and `secret`.
|
|
|
|
If you use AstrBot WebUI's `One-click QR setup`, you can skip this step. AstrBot fills in `appid` and `secret` automatically after QR binding succeeds.
|
|
|
|
### Add IP Whitelist
|
|
|
|
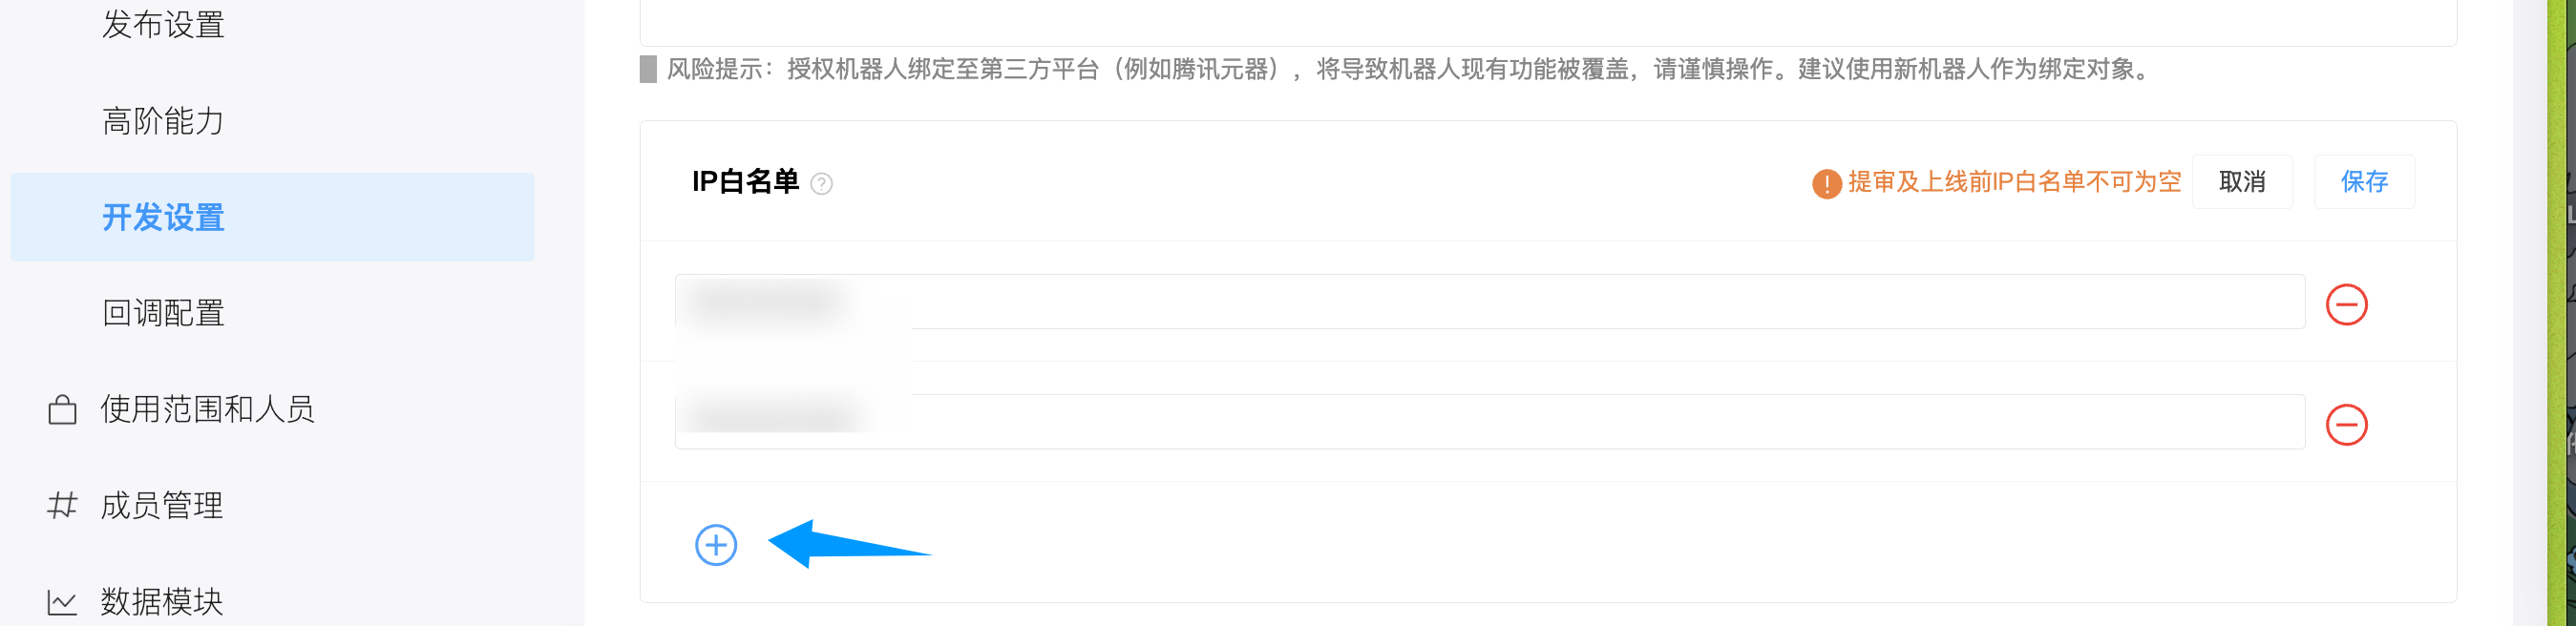
Open `Development -> Development Settings`, find IP whitelist, and add your server IP.
|
|
|
|
|
|
|
|
> [!TIP]
|
|
> If you do not know your server IP, run `curl ifconfig.me` or check [ip138.com](https://ip138.com/).
|
|
>
|
|
> In NAT environments without a public IP, the observed IP may change depending on your carrier. Use proxy/tunnel if needed.
|
|
|
|
### Configure in AstrBot
|
|
|
|
1. Open AstrBot Dashboard.
|
|
2. Click `Bots` in the left sidebar.
|
|
3. Click `+ Create Bot`.
|
|
4. Select `QQ Official Bot (Webhook)`.
|
|
|
|
Recommended: use `One-click QR setup`.
|
|
|
|
1. Under `Choose setup method`, select `One-click QR setup`.
|
|
2. Click start, then scan and confirm the QR code with mobile QQ.
|
|
3. Wait until the page shows binding success. AstrBot fills in `appid` and `secret` automatically.
|
|
4. Keep `Unified Webhook Mode` enabled, adjust `ID` and other options as needed, then click `Save`.
|
|
|
|
If QR setup is unavailable, choose `Manual setup` and fill in:
|
|
|
|
- ID (`id`): any unique identifier.
|
|
- Enable (`enable`): checked.
|
|
- `appid`: from QQ Official Bot platform.
|
|
- `secret`: from QQ Official Bot platform.
|
|
- Unified Webhook Mode (`unified_webhook_mode`): keep enabled.
|
|
|
|
Click `Save`.
|
|
|
|
### Configure Reverse Proxy
|
|
|
|
After saving, configure DNS and reverse proxy for your server. Forward requests to AstrBot's `6185` port. If `Unified Webhook Mode` is disabled, forward requests to the port configured in the previous step instead.
|
|
|
|
The Webhook callback URL must be reachable from QQ Open Platform over the public internet and must use HTTPS.
|
|
|
|
### Configure Callback URL and Events
|
|
|
|
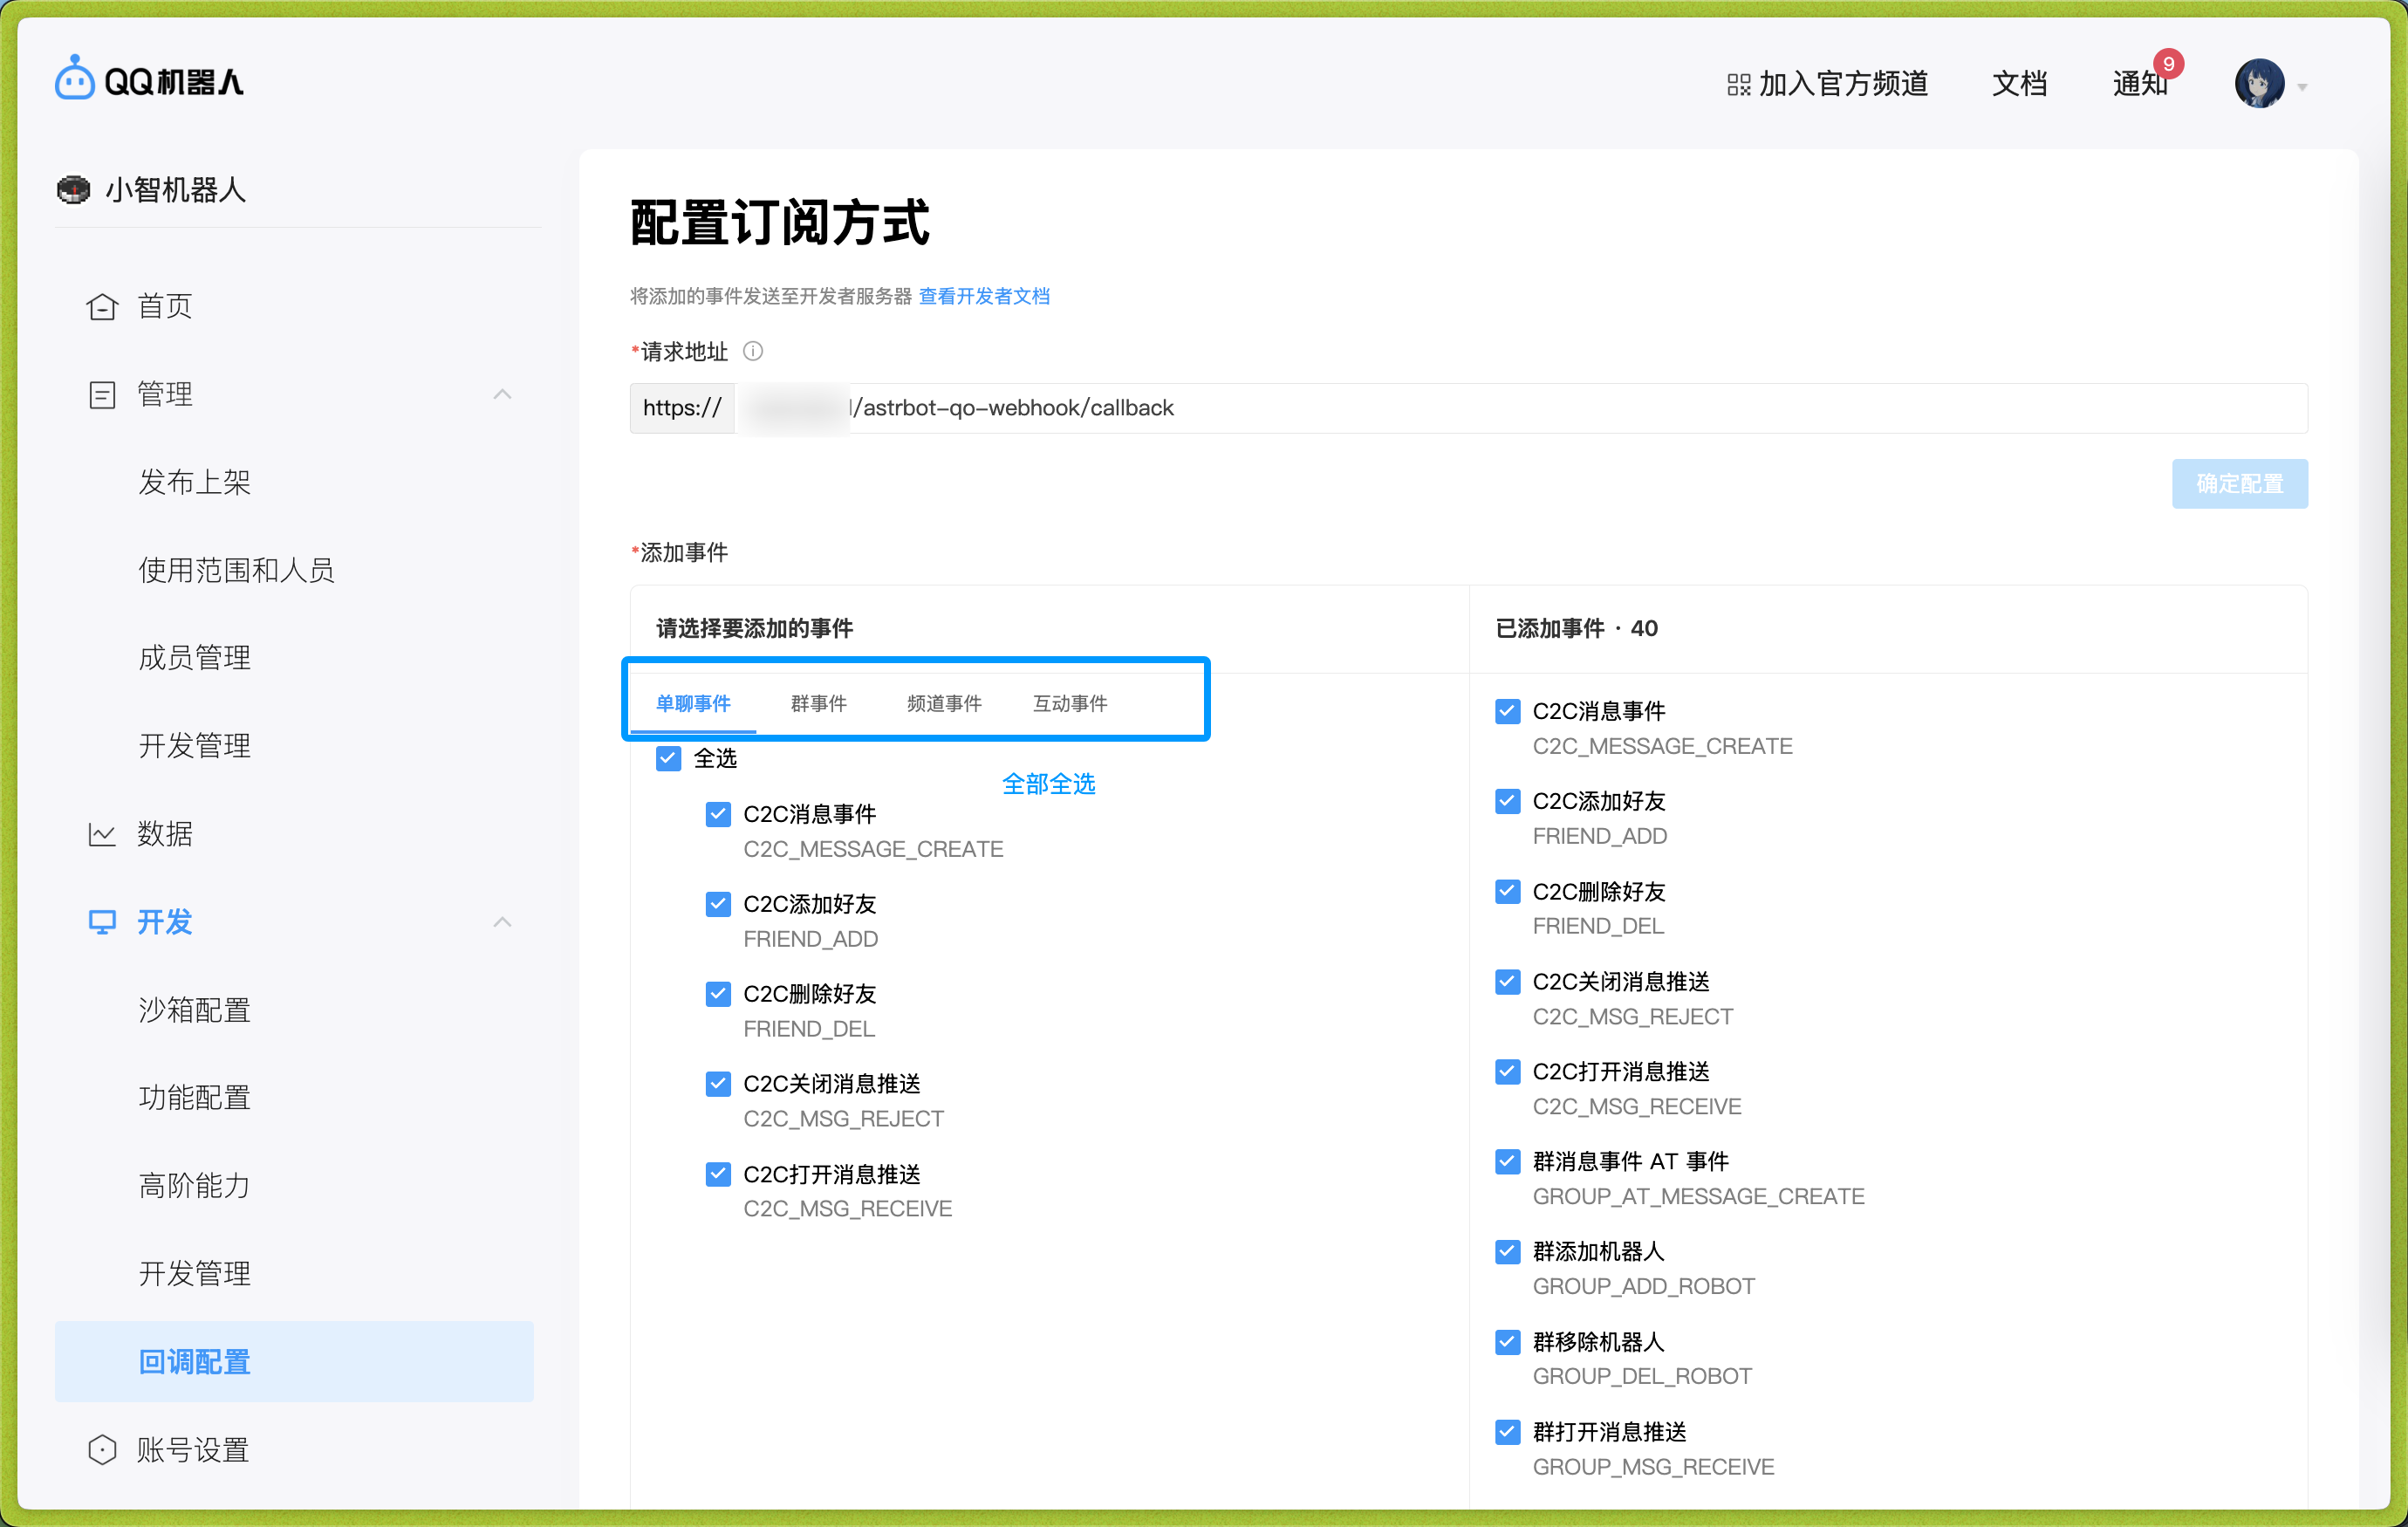
Open `Development -> Callback Configuration`.
|
|
|
|
After you save the bot in AstrBot, AstrBot generates a unique Webhook callback URL. You can find it in the logs or on the bot card in WebUI.
|
|
|
|
Use that URL as the request URL.
|
|
|
|
Then add callback events. To receive full group messages, select the group event `GROUP_MESSAGE_CREATE`; also select private chat events, channel events, and other events as needed.
|
|
|
|
|
|
|
|
After entering values, move focus out of the input box to trigger validation. If validation passes, the confirm button on the right becomes clickable.
|
|
|
|
Then restart AstrBot.
|
|
|
|
## Appendix: Reverse Proxy Setup
|
|
|
|
If you are new to reverse proxy, Caddy is recommended:
|
|
|
|
1. Install Caddy: <https://caddy2.dengxiaolong.com/docs/install>
|
|
2. Configure reverse proxy: <https://caddy2.dengxiaolong.com/docs/quick-starts/reverse-proxy>
|
|
|
|
Caddy can automatically apply TLS certificates for Webhook access.
|