mirror of
https://github.com/AstrBotDevs/AstrBot
synced 2026-07-17 09:50:31 +08:00
 597ed67467
* fix: avoid lsp client cancel scope leaks

* fix: observe lsp reader task failures

* fix: trim trailing whitespace in docs

* fix: harden lsp client reconnect handling

* fix: refine lsp client test coverage

* fix: harden lsp reader task teardown

* fix: refine lsp reader failure handling

* fix: centralize lsp reader lifecycle

* docs: fix platform adapter session type

* test: shorten hanging lsp fixture sleep

* docs: translate ai guide details label

* fix: simplify lsp reader task lifecycle
93 lines
2.9 KiB
Markdown
93 lines
2.9 KiB
Markdown
# 通过源码部署 AstrBot
|
||
|
||
> [!WARNING]
|
||
> 你正在直接通过源码来部署本项目,该教程需要您具有一定的技术基础。
|
||
>
|
||
> 以下教程默认您的设备上已经安装 Python,并且版本 `>=3.10`
|
||
|
||
|
||
## 下载/克隆仓库
|
||
|
||
如果你的电脑上安装了 `git`,你可以通过以下命令来下载源码:
|
||
|
||
```bash
|
||
git clone https://github.com/AstrBotDevs/AstrBot.git
|
||
# 上面的代码默认会拉取最新的提交的源码,如果你需要拉取最新稳定发行版本的源码,可以使用以下命令:
|
||
# git clone --depth=1 --branch $(git ls-remote --tags --sort='-v:refname' https://github.com/AstrBotDevs/AstrBot.git | head -n1 | awk -F/ '{print $3}') https://github.com/AstrBotDevs/AstrBot.git
|
||
cd AstrBot
|
||
```
|
||
|
||
如果你没有安装 `git`,请先下载安装。
|
||
|
||
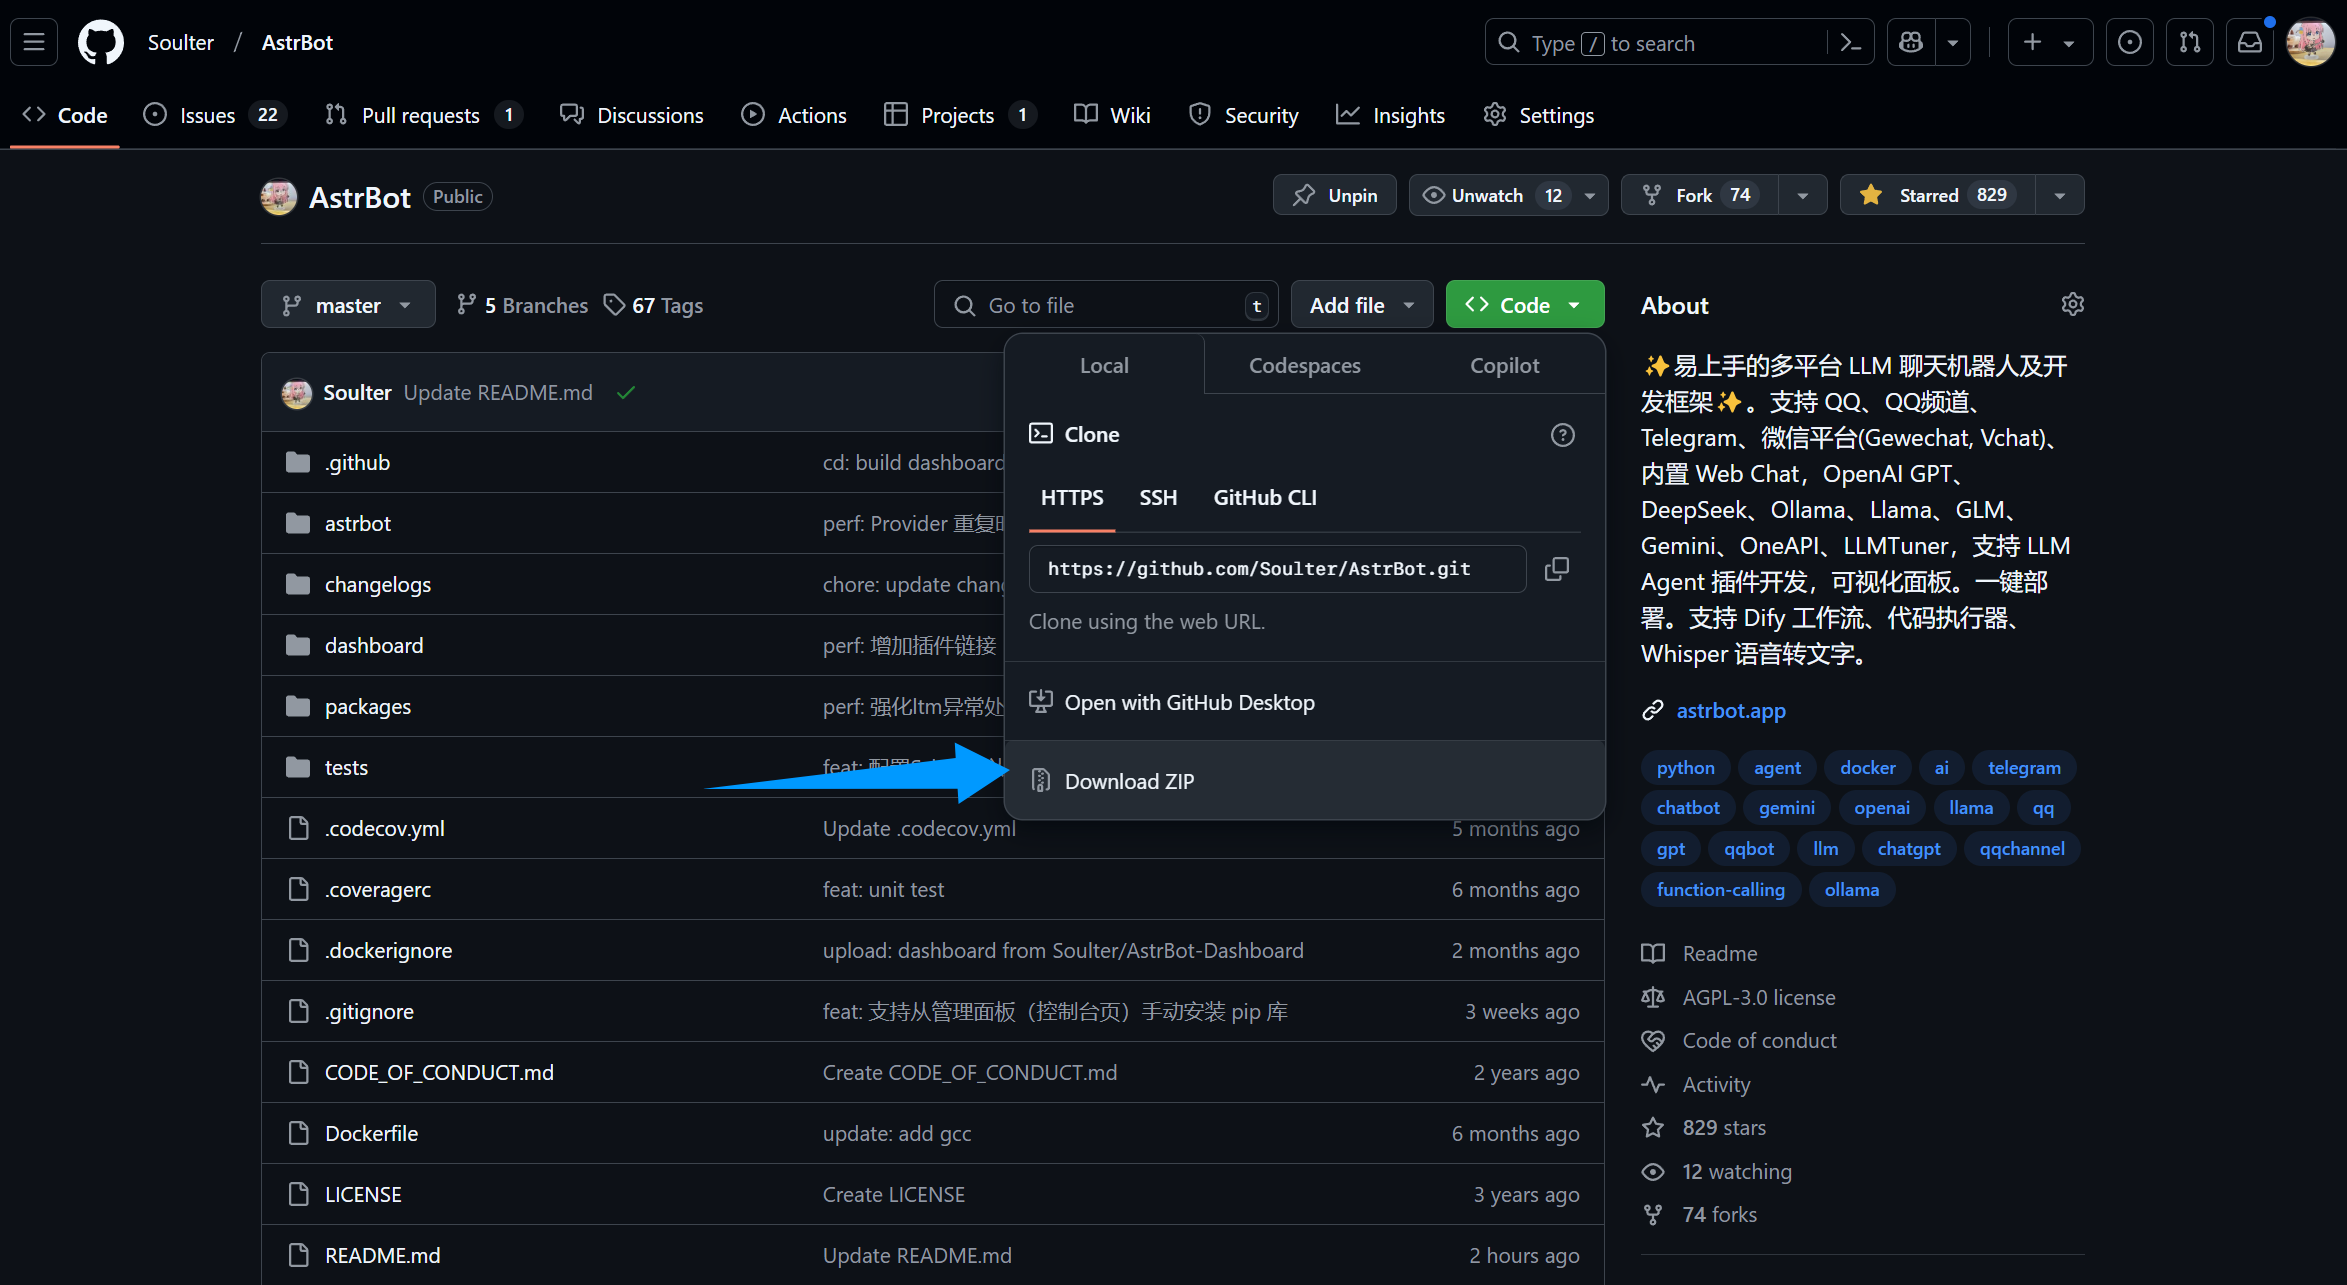
或者,直接从 GitHub 上下载源码解压:
|
||
|
||
|
||
|
||
## 安装依赖并运行
|
||
|
||
::: details 【🥳推荐】使用 `uv` 管理依赖
|
||
|
||
> 如果没安装 `uv`,请参考 [Installing uv](https://docs.astral.sh/uv/getting-started/installation/) 安装。
|
||
|
||
2. 在终端执行(AstrBot 目录下)
|
||
```bash
|
||
uv sync
|
||
uv run main.py
|
||
```
|
||
|
||
如果您安装了一些插件,建议后续启动附上 `--no-sync` 参数,以避免插件依赖库被重复安装。我们正在努力解决这个问题,敬请期待。
|
||
|
||
```bash
|
||
uv run --no-sync main.py
|
||
```
|
||
:::
|
||
|
||
::: details Python 内置 venv 安装依赖
|
||
|
||
在 AstrBot 源码目录下,使用终端运行以下命令:
|
||
|
||
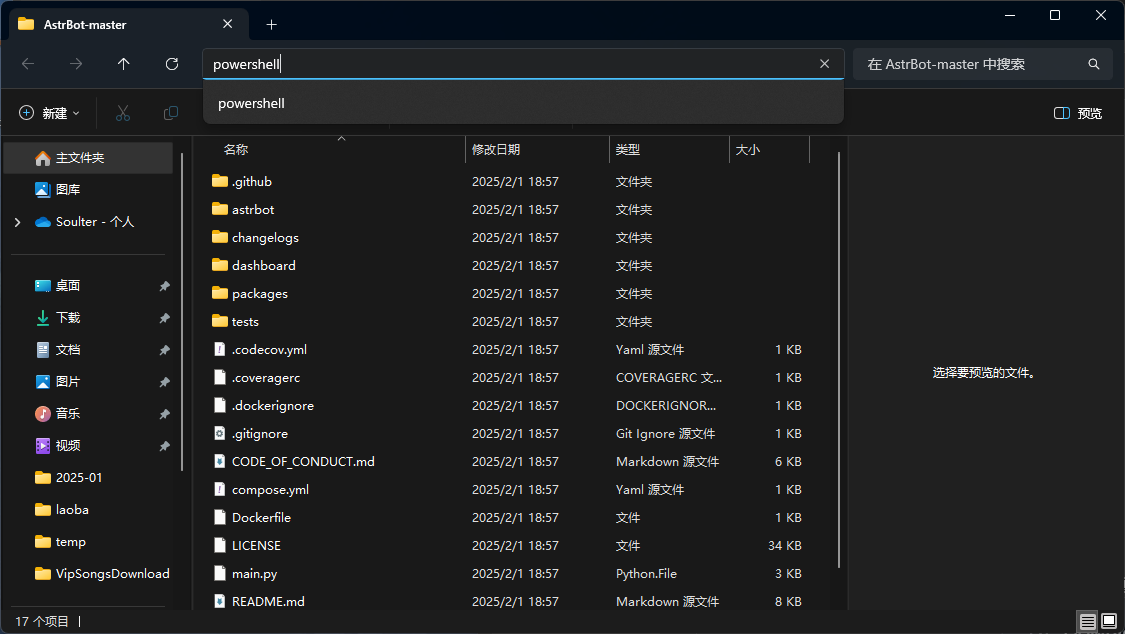
> 如果是 Windows,直接下载源码解压的,请打开解压的文件夹,在地址栏输入:
|
||
> 
|
||
|
||
```bash
|
||
python3 -m venv ./venv
|
||
```
|
||
|
||
> 也可能是 `python` 而不是 `python3`
|
||
|
||
以上步骤会创建一个虚拟环境并激活(以免打乱您设备本地的 Python 环境)。
|
||
|
||
接下来,通过以下命令安装依赖文件,这可能需要花费一些时间:
|
||
|
||
Mac/Linux/WSL 执行:
|
||
|
||
```bash
|
||
source venv/bin/activate
|
||
python -m pip install -r requirements.txt -i https://mirrors.tuna.tsinghua.edu.cn/pypi/web/simple
|
||
python main.py
|
||
```
|
||
|
||
Windows 执行:
|
||
|
||
```bash
|
||
venv\Scripts\activate
|
||
python -m pip install -r requirements.txt -i https://mirrors.tuna.tsinghua.edu.cn/pypi/web/simple
|
||
python main.py
|
||
```
|
||
:::
|
||
|
||
|
||
## 🎉 大功告成!
|
||
|
||
如果一切顺利,你会看到 AstrBot 打印出的日志。
|
||
|
||
如果没有报错,你会看到一条日志显示类似 `🌈 管理面板已启动,可访问` 并附带了几条链接。打开其中一个链接即可访问 AstrBot 管理面板。链接是 `http://localhost:6185`。
|
||
|
||
> [!TIP]
|
||
> 如果你正在服务器上部署 AstrBot,需要将 `localhost` 替换为你的服务器 IP 地址。
|
||
>
|
||
> 默认用户名和密码是 `astrbot` 和 `astrbot`。
|
||
|
||
|
||
接下来,你需要部署任何一个消息平台,才能够实现在消息平台上使用 AstrBot。
|