mirror of
https://github.com/AstrBotDevs/AstrBot
synced 2026-07-17 09:50:31 +08:00

94 lines
2.8 KiB
Markdown
94 lines
2.8 KiB
Markdown
# Connect QQ via QQ Official Bot (Webhook)
|
|
|
|
> [!WARNING]
|
|
> 1. QQ Official Bot currently requires an IP whitelist.
|
|
> 2. It supports group chat, private chat, channel chat, and channel private chat.
|
|
> 3. You need a server with a public IP and a domain.
|
|
|
|
## Supported Basic Message Types
|
|
|
|
> Version v4.19.6.
|
|
|
|
| Message Type | Receive | Send | Notes |
|
|
| --- | --- | --- | --- |
|
|
| Text | Yes | Yes | |
|
|
| Image | Yes | Yes | |
|
|
| Voice | Yes | Yes | |
|
|
| Video | Yes | Yes | |
|
|
| File | Yes | Yes | |
|
|
|
|
Proactive message push: Supported.
|
|
|
|
## Apply for a Bot
|
|
|
|
Open [QQ Official Bot](https://q.qq.com) and sign in.
|
|
|
|
Create a bot, fill in name/description/avatar, then submit for review. After security verification passes, creation is complete.
|
|
|
|
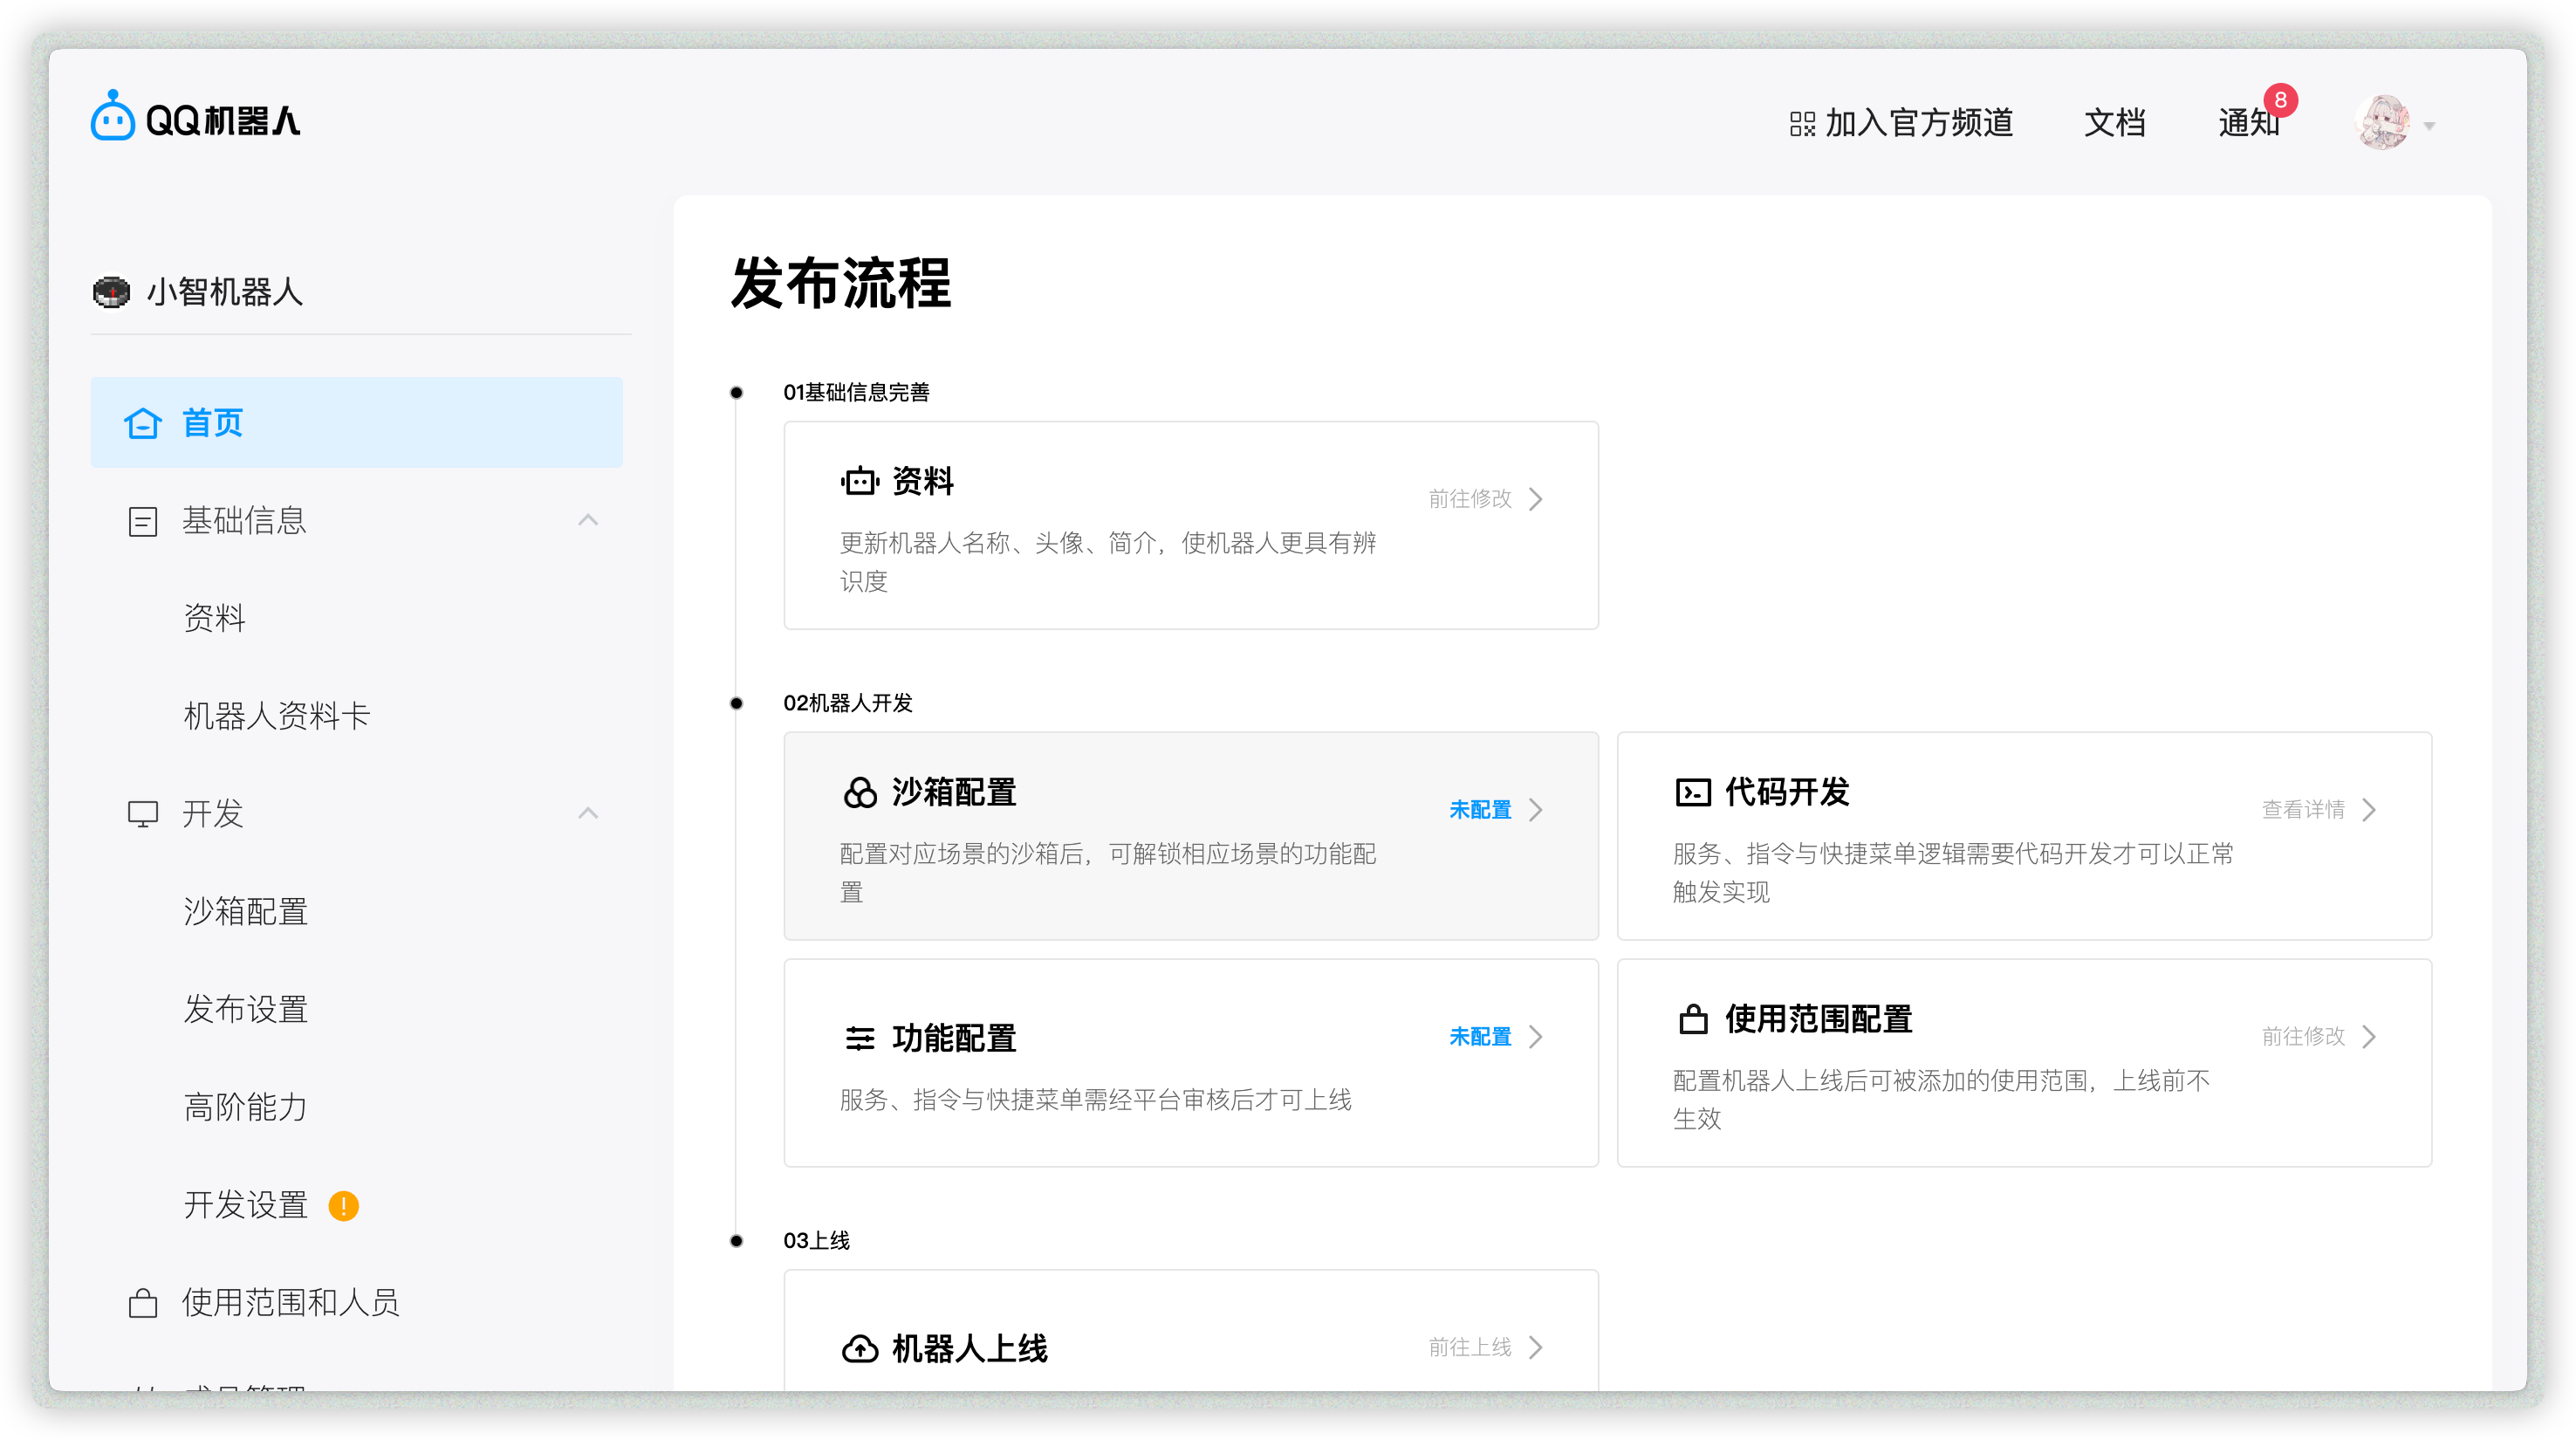
Open the created bot to enter its management page:
|
|
|
|
|
|
|
|
## Allow Bot in Channel / Group / Private Chat
|
|
|
|
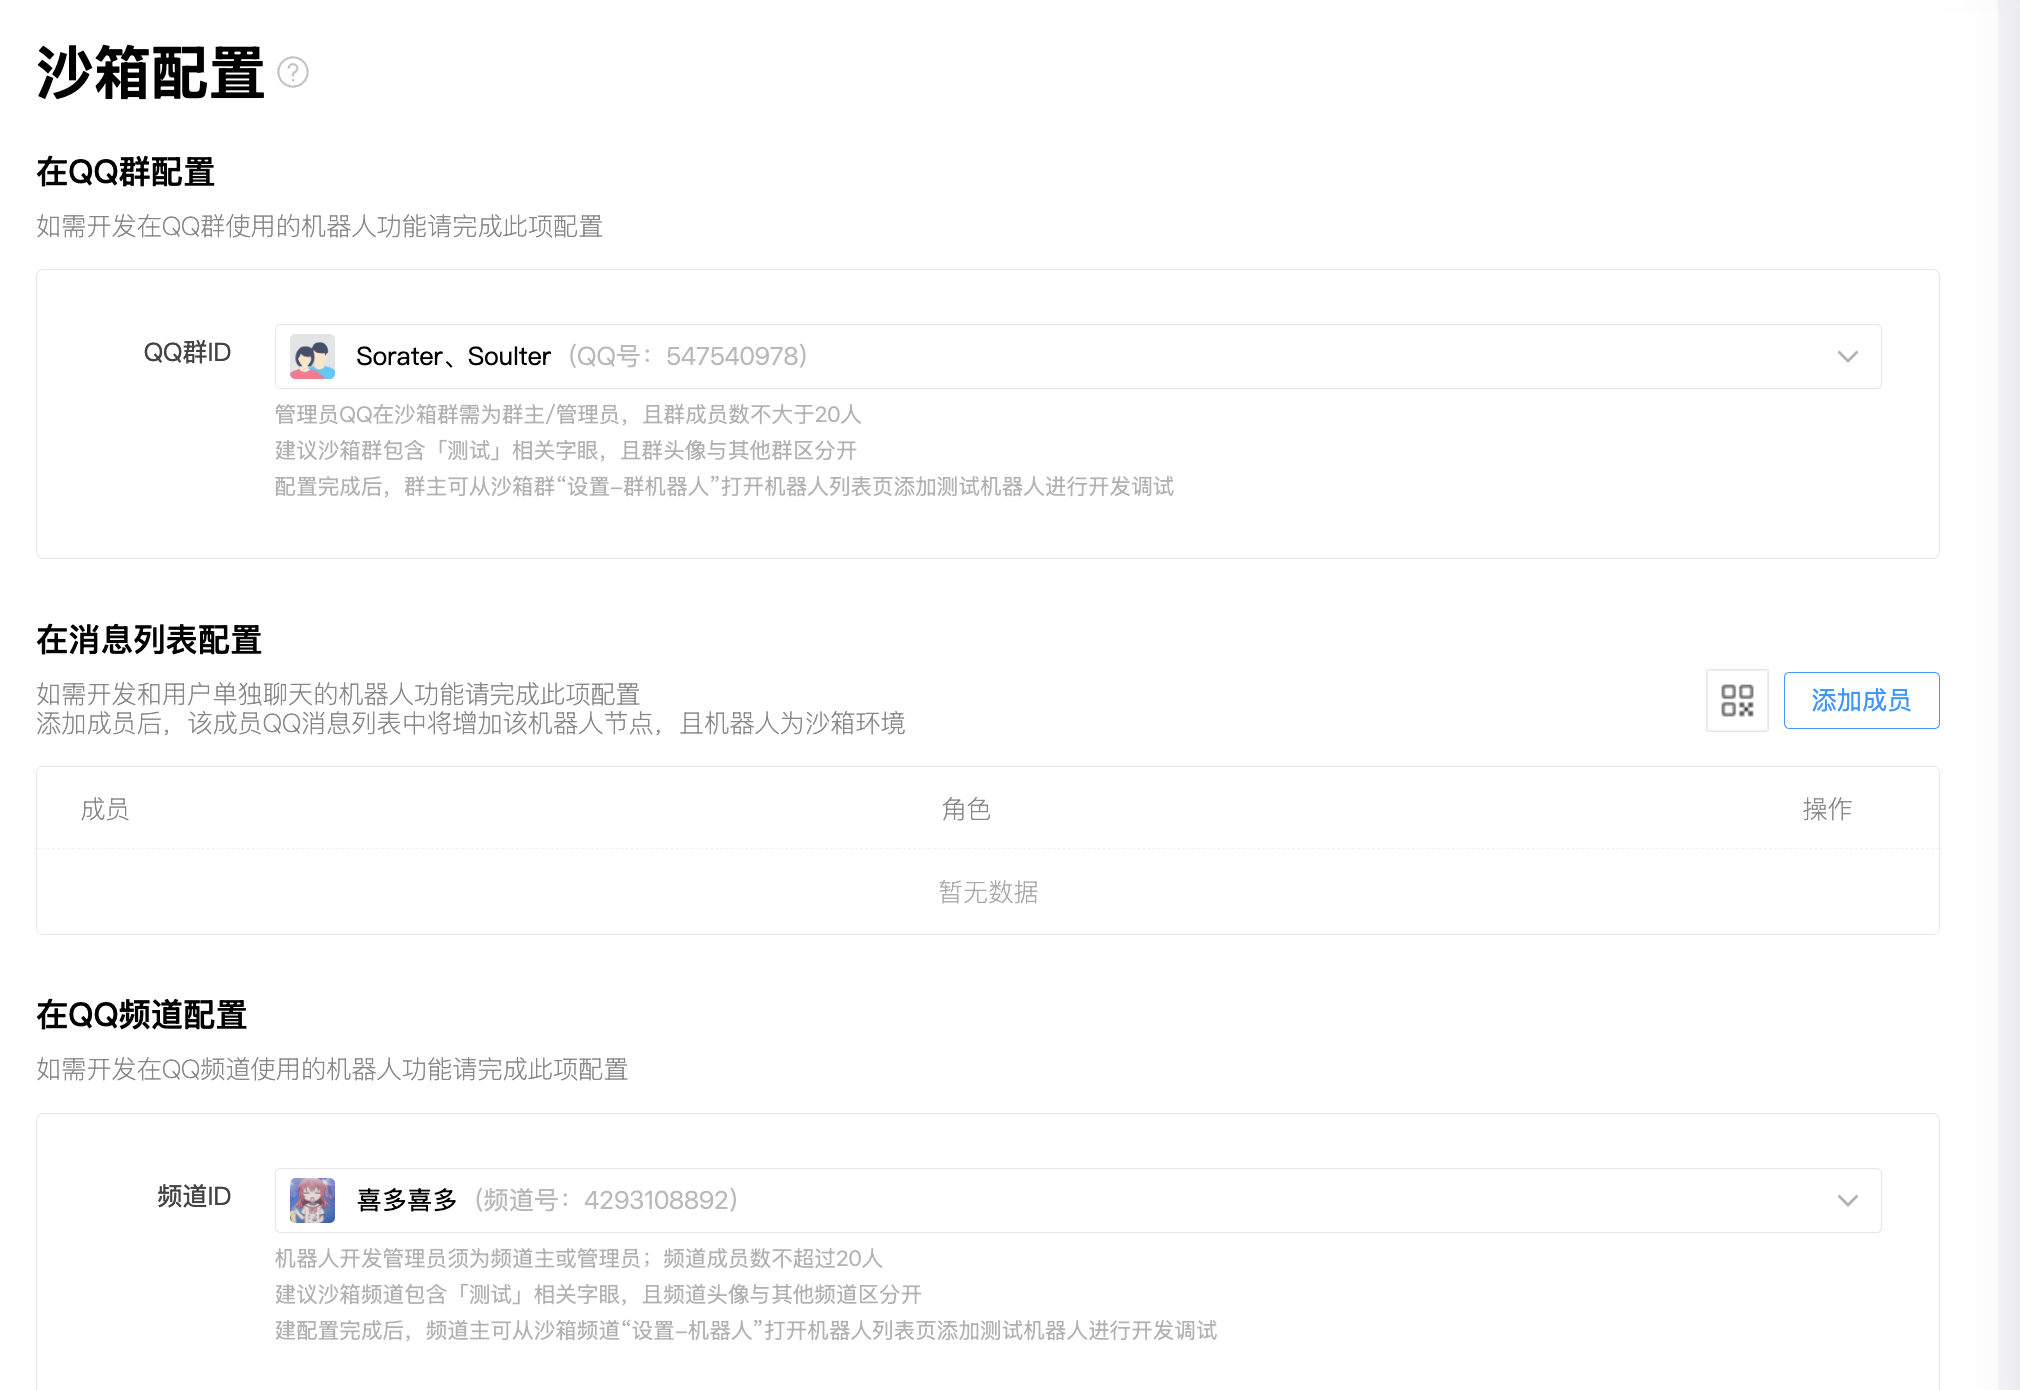
Open `Sandbox Configuration` to set a sandbox channel / QQ group / QQ private chat (up to 20 members).
|
|
|
|
Then configure QQ groups, private chat QQ accounts, and QQ channels as needed.
|
|
|
|
|
|
|
|
## Get `appid` and `secret`
|
|
|
|
After adding the bot where you need it, open `Development -> Development Settings`, then copy `appid` and `secret`.
|
|
|
|
## Add IP Whitelist
|
|
|
|
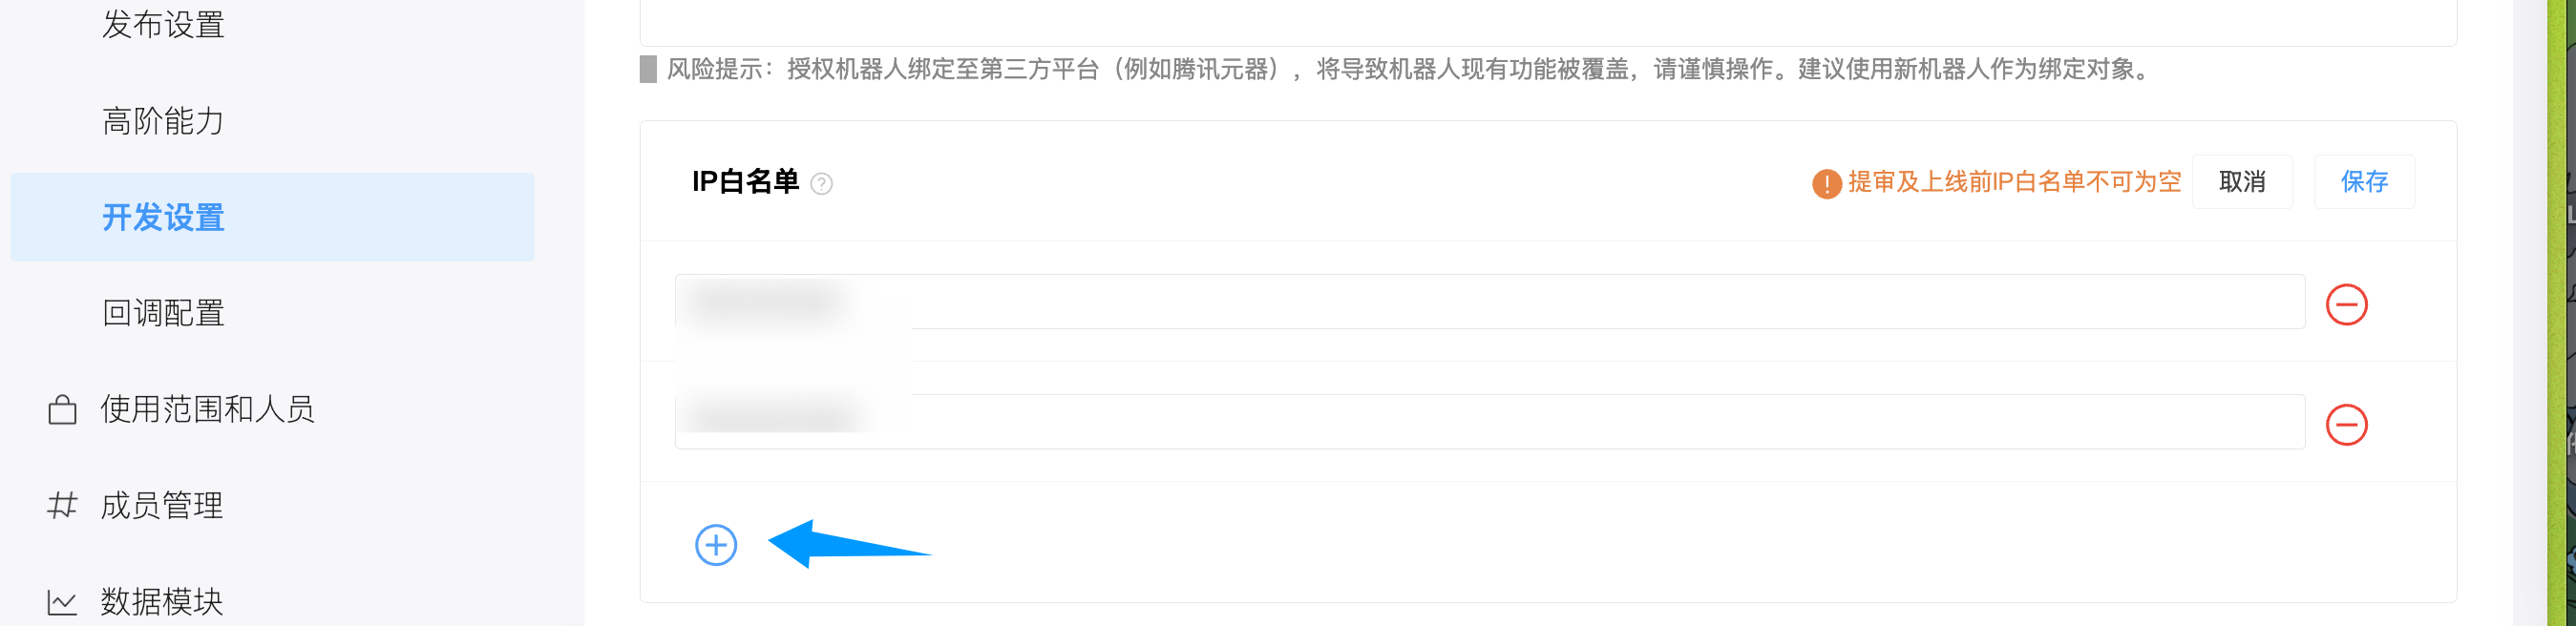
Open `Development -> Development Settings`, find IP whitelist, and add your server IP.
|
|
|
|
|
|
|
|
## Configure in AstrBot
|
|
|
|
1. Open AstrBot Dashboard.
|
|
2. Click `Bots` in the left sidebar.
|
|
3. Click `+ Create Bot`.
|
|
4. Select `qq_official_webhook`.
|
|
|
|
Fill in:
|
|
|
|
- ID (`id`): any unique identifier.
|
|
- Enable (`enable`): checked.
|
|
- `appid`: from QQ Official Bot platform.
|
|
- `secret`: from QQ Official Bot platform.
|
|
|
|
Click `Save`.
|
|
|
|
## Configure Callback URL
|
|
|
|
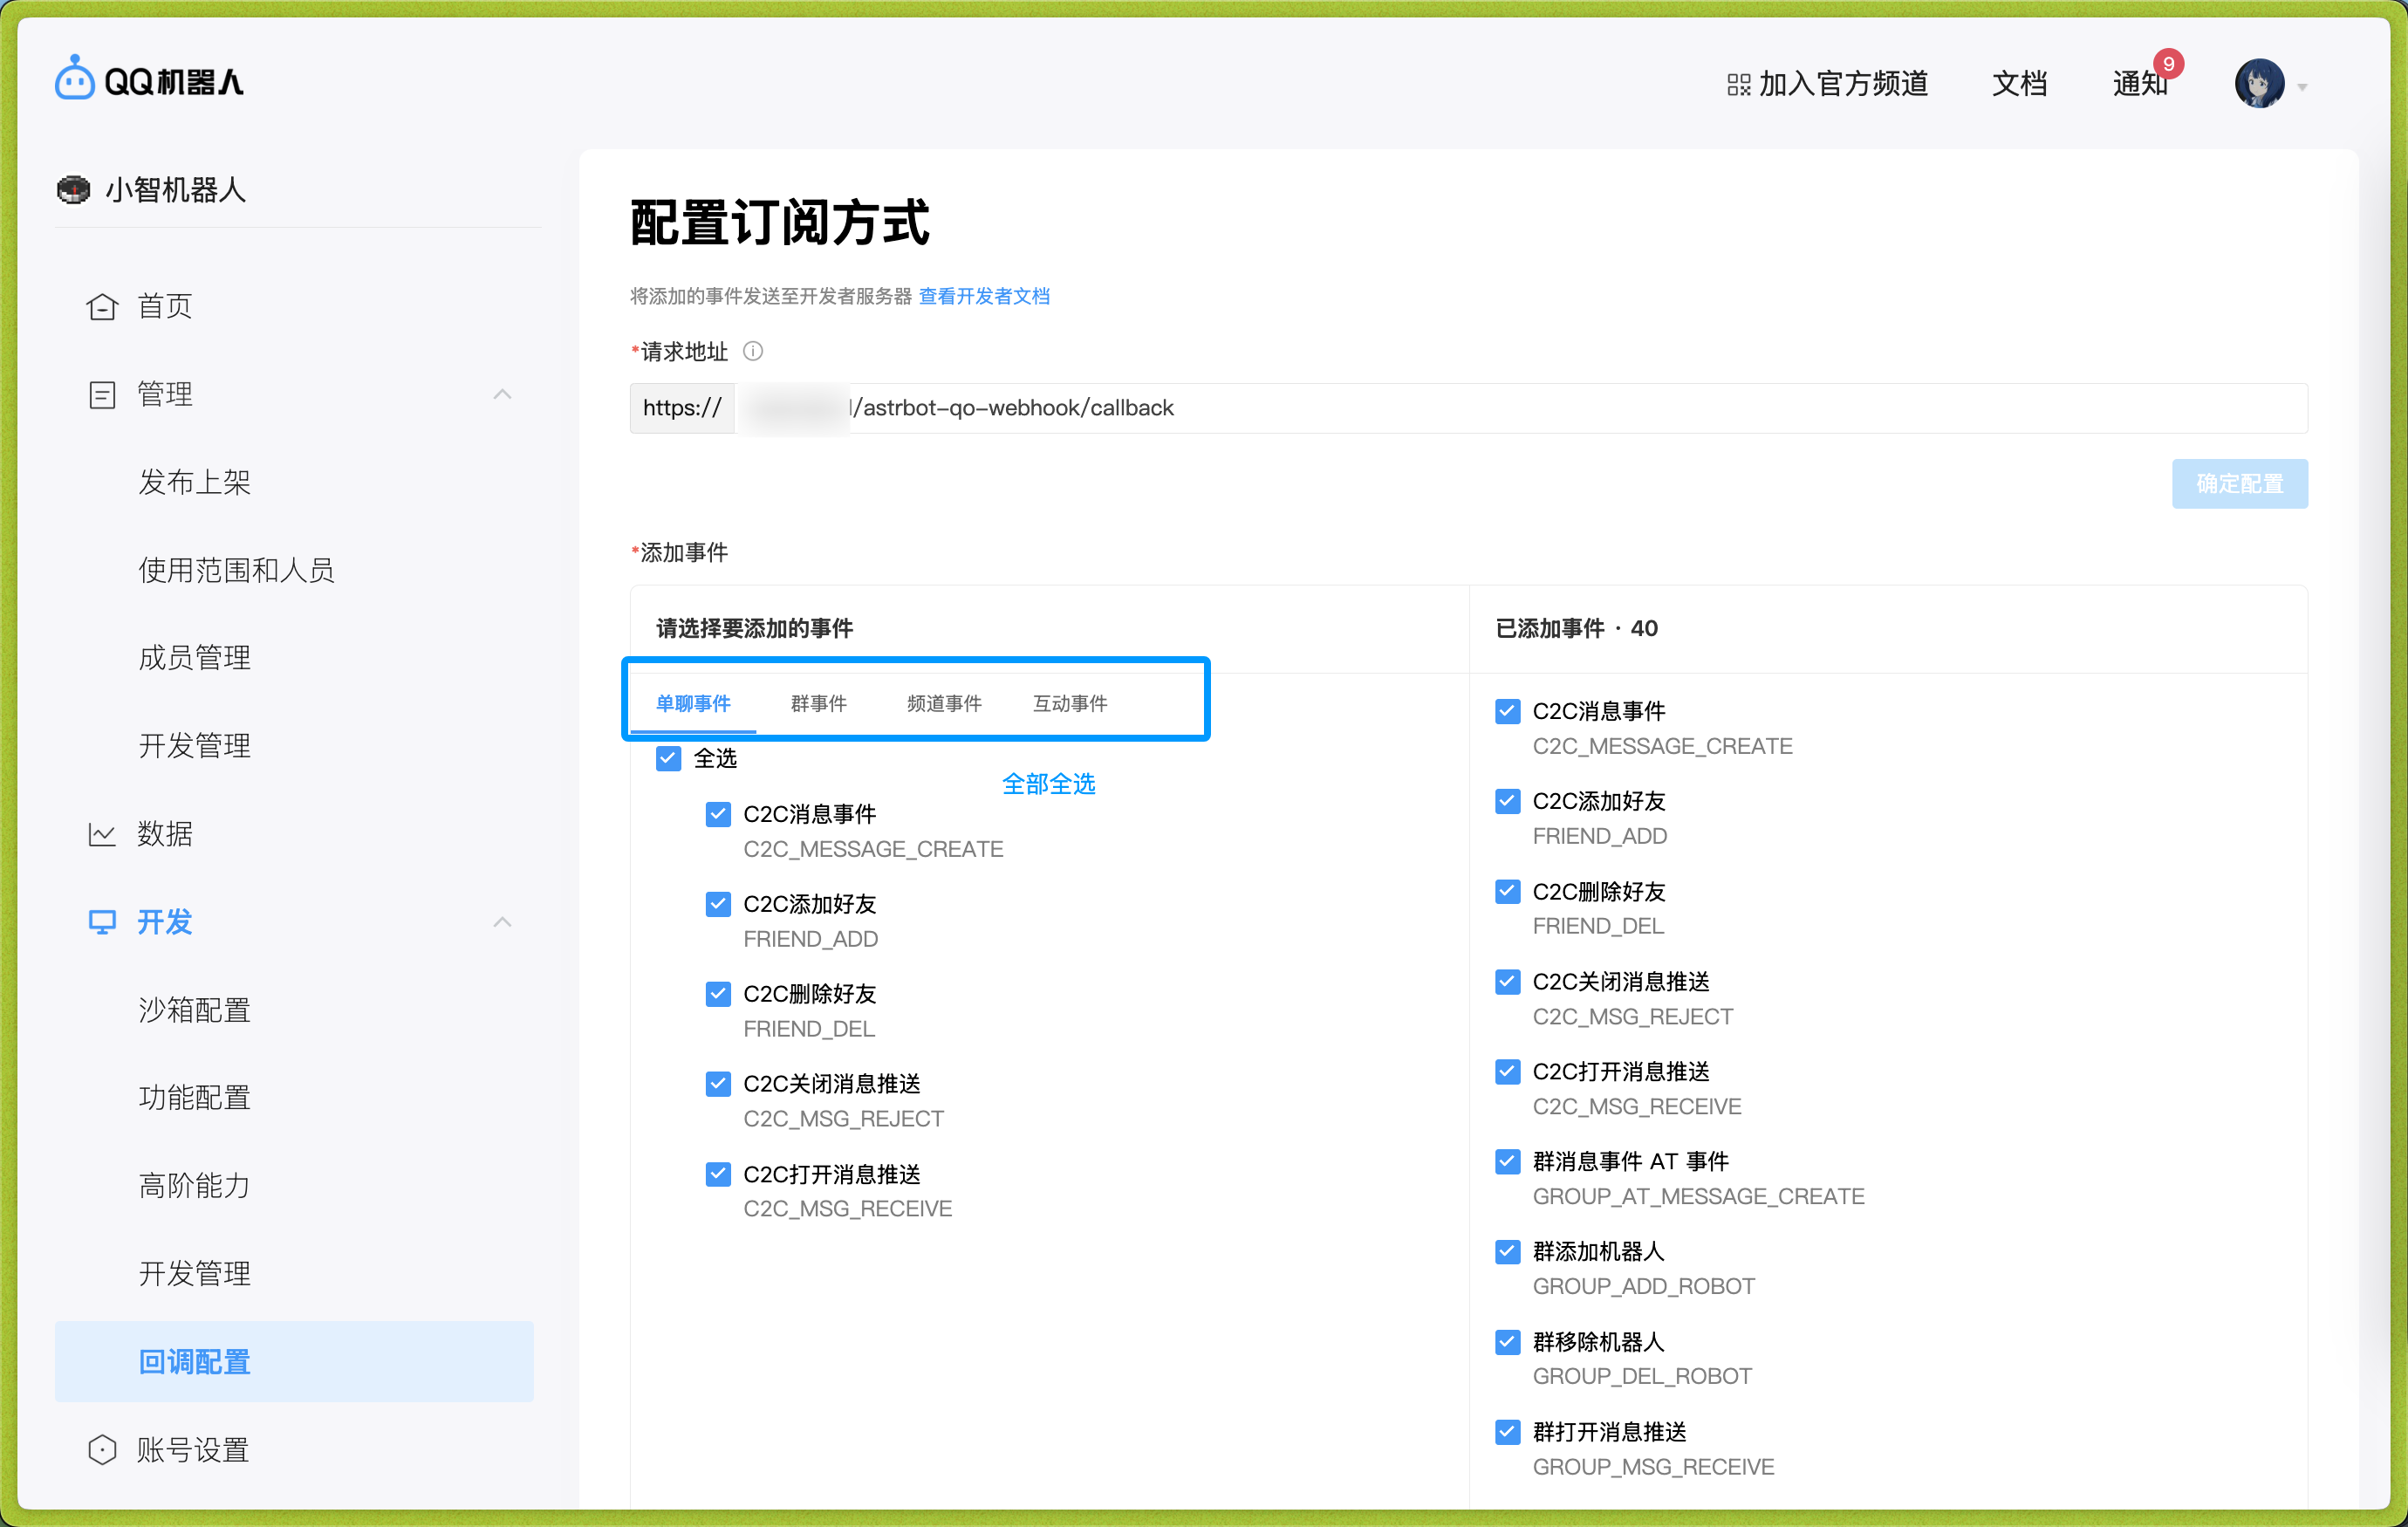
In `Development -> Callback Configuration`, configure callback URL.
|
|
|
|
Set request URL to `<your-domain>/astrbot-qo-webhook/callback`.
|
|
|
|
Your domain should reverse-proxy traffic to AstrBot port `6196` using `Caddy`, `Nginx`, or `Apache`.
|
|
|
|
Then add callback events and select all four event categories (private, group, channel, etc.).
|
|
|
|
|
|
|
|
After entering values, move focus out of the input box to trigger validation. If validation passes, the confirm button on the right becomes clickable.
|
|
|
|
Then restart AstrBot.
|
|
|
|
## Done
|
|
|
|
AstrBot should now be connected. If messages do not respond immediately, wait 1-2 minutes, restart AstrBot, and test again.
|
|
|
|
## Appendix: Reverse Proxy Setup
|
|
|
|
If you are new to reverse proxy, Caddy is recommended:
|
|
|
|
1. Install Caddy: <https://caddy2.dengxiaolong.com/docs/install>
|
|
2. Configure reverse proxy: <https://caddy2.dengxiaolong.com/docs/quick-starts/reverse-proxy>
|
|
|
|
Caddy can automatically apply TLS certificates for Webhook access.
|