mirror of
https://github.com/AstrBotDevs/AstrBot
synced 2026-07-19 10:22:04 +08:00

49 lines
1.8 KiB
Markdown
49 lines
1.8 KiB
Markdown
|
|
# 开发环境准备
|
|
|
|
## 获取插件模板
|
|
|
|
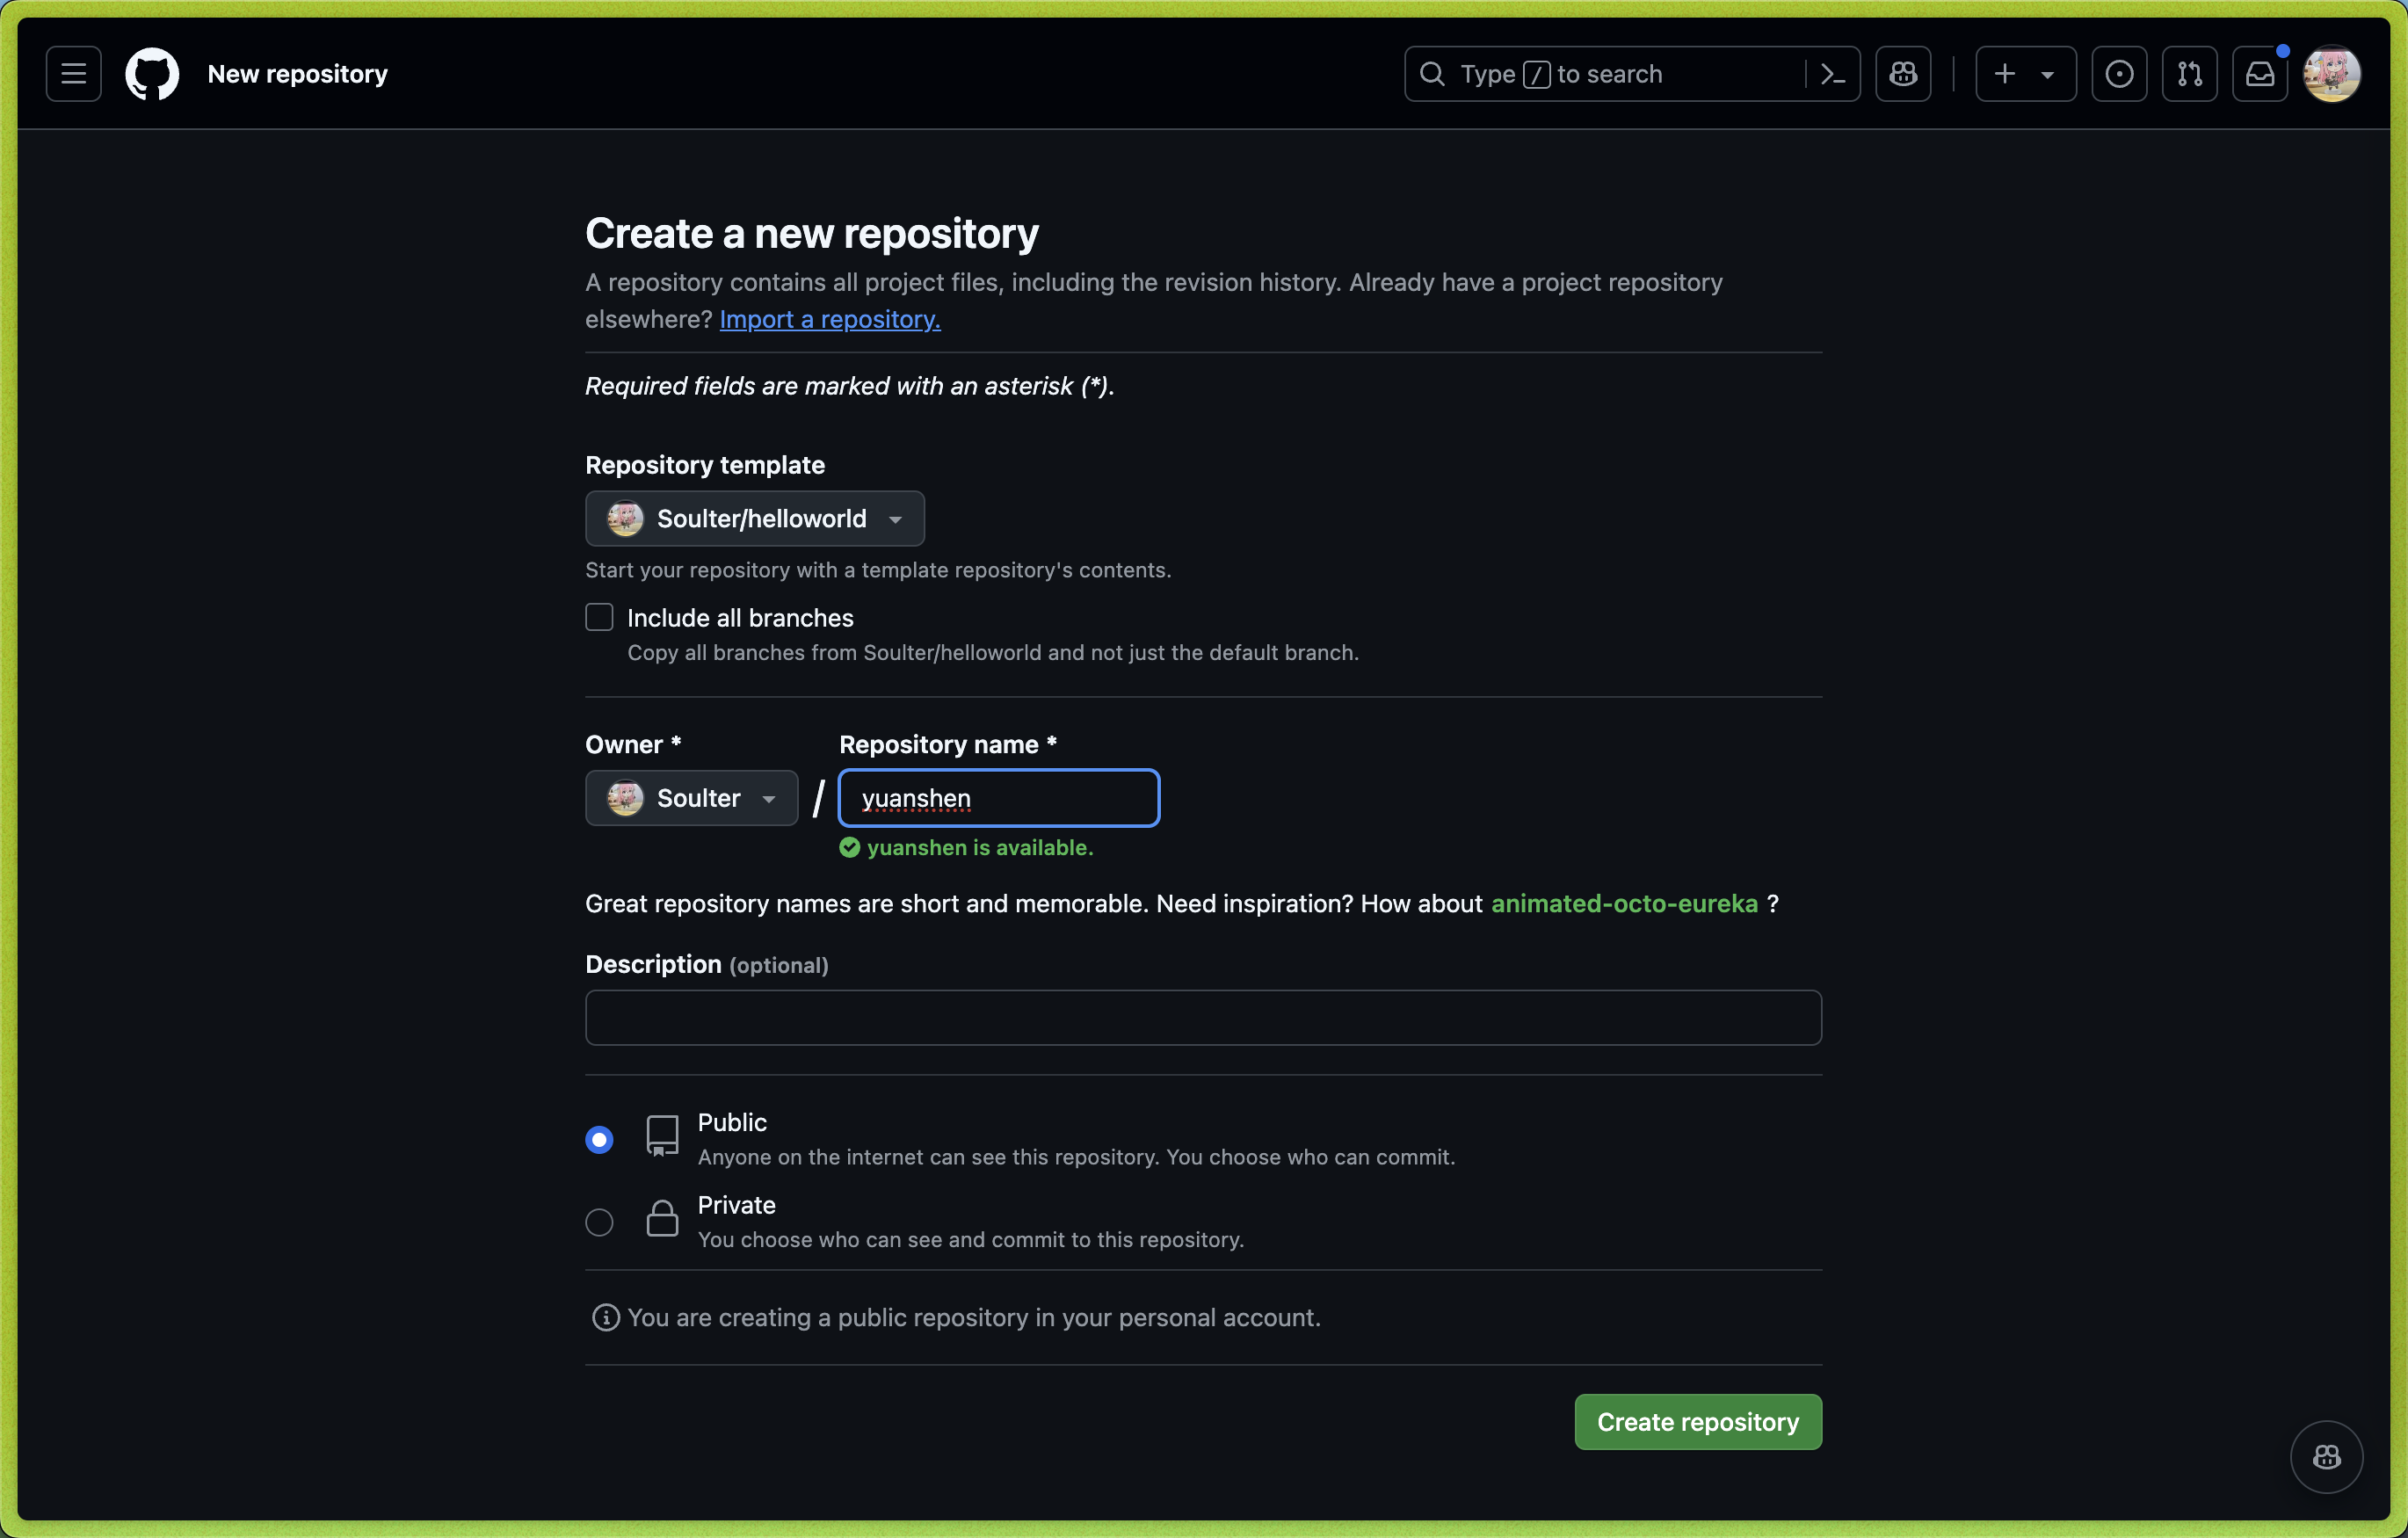
1. 打开 AstrBot 插件模板: [helloworld](https://github.com/Soulter/helloworld)
|
|
2. 点击右上角的 `Use this template`
|
|
3. 然后点击 `Create new repository`。
|
|
4. 在 `Repository name` 处填写您的插件名。插件名格式:
|
|
- 推荐以 `astrbot_plugin_` 开头;
|
|
- 不能包含空格;
|
|
- 保持全部字母小写;
|
|
- 尽量简短。
|
|
5. 点击右下角的 `Create repository`。
|
|
|
|
|
|
|
|
## Clone 插件和 AstrBot 项目
|
|
|
|
Clone AstrBot 项目本体和刚刚创建的插件仓库到本地。
|
|
|
|
```bash
|
|
git clone https://github.com/AstrBotDevs/AstrBot
|
|
mkdir -p AstrBot/data/plugins
|
|
cd AstrBot/data/plugins
|
|
git clone 插件仓库地址
|
|
```
|
|
|
|
然后,使用 `VSCode` 打开 `AstrBot` 项目。找到 `data/plugins/<你的插件名字>` 目录。
|
|
|
|
更新 `metadata.yaml` 文件,填写插件的元数据信息。
|
|
|
|
> [!NOTE]
|
|
> AstrBot 插件市场的信息展示依赖于 `metadata.yaml` 文件。
|
|
|
|
## 调试插件
|
|
|
|
AstrBot 采用在运行时注入插件的机制。因此,在调试插件时,需要启动 AstrBot 本体。
|
|
|
|
您可以使用 AstrBot 的热重载功能简化开发流程。
|
|
|
|
插件的代码修改后,可以在 AstrBot WebUI 的插件管理处找到自己的插件,点击右上角 `...` 按钮,选择 `重载插件`。
|
|
|
|
## 插件依赖管理
|
|
|
|
目前 AstrBot 对插件的依赖管理使用 `pip` 自带的 `requirements.txt` 文件。如果你的插件需要依赖第三方库,请务必在插件目录下创建 `requirements.txt` 文件并写入所使用的依赖库,以防止用户在安装你的插件时出现依赖未找到(Module Not Found)的问题。
|
|
|
|
> `requirements.txt` 的完整格式可以参考 [pip 官方文档](https://pip.pypa.io/en/stable/reference/requirements-file-format/)。
|